Making Fibreglass Moulds
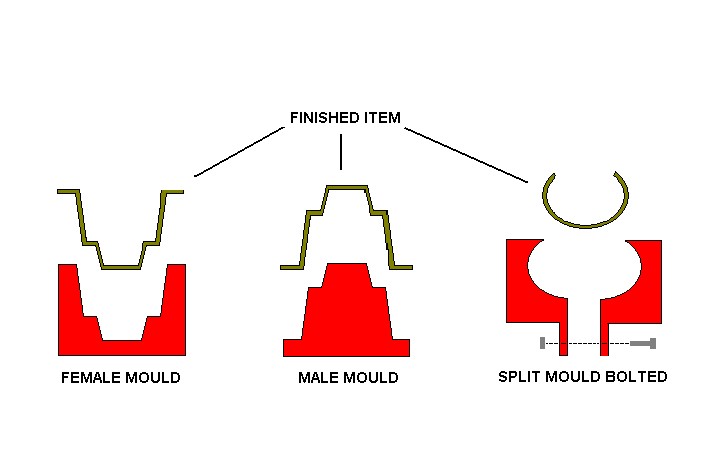
Moulds fall into two groups – male and female. Glassfibre is laminated on the outside of a male mould and on the inside of a female mould. The desired finish whether it be smooth or textured will be on the side nearest to the mould. A female mould would be used for example to produce car body parts, boat hulls etc where the finish has to be on the outside. A male mould would be used for example on baths, shower trays etc where the finish has to be on the inside.

Please note workshop conditions are critical when proceeding into the stage of mould making. Temperatures should be between 18º– 22ºC , direct sunlight should be avoided, any workshop heating should be directed away from work area as any kind of draft, hot or cold, should be avoided. Humidity should be normal and constant.
The Plug / Master Mould:
To produce a mould you need a pattern or former commonly called a “plug” – an exact replica of the finished item. The plug can also be an existing item i.e. motorbike or car panel, canoe, dinghy etc but be wary of infringing copyright. Usually you will have to make the plug from scratch. The plug can be made from almost any material as long as it is made rigid, accurate, and dimensionally stable and set on a solid foundation.
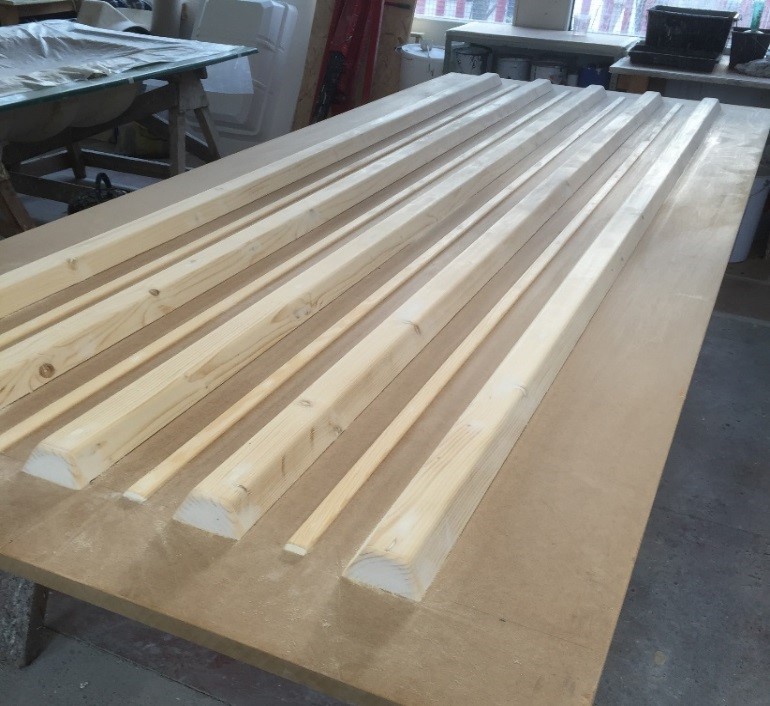
It is necessary to have slight taper on side walls of your plug so that the mould can be removed easily. Typically a large mould would need to be a rigid wood frame covered in hardboard, plywood or MDF, clay or plaster can be used and reinforced with wire netting and Hessian (Pic 1), as toolmakers we tend to manufacture from wood, before applying the primer, fill in any grain, holes, dints and joints as any defects will show on your finished mould. Hammer down any nails using a punch and counter sink, any screws or nails cover using polyester body filler, the surface must be smooth and free from blemishes. Seal the wood with a hard varnish such especially if using MDF, a good sand and sealer or shellac varnish can be used. Then sand down with 60 grit sand paper.
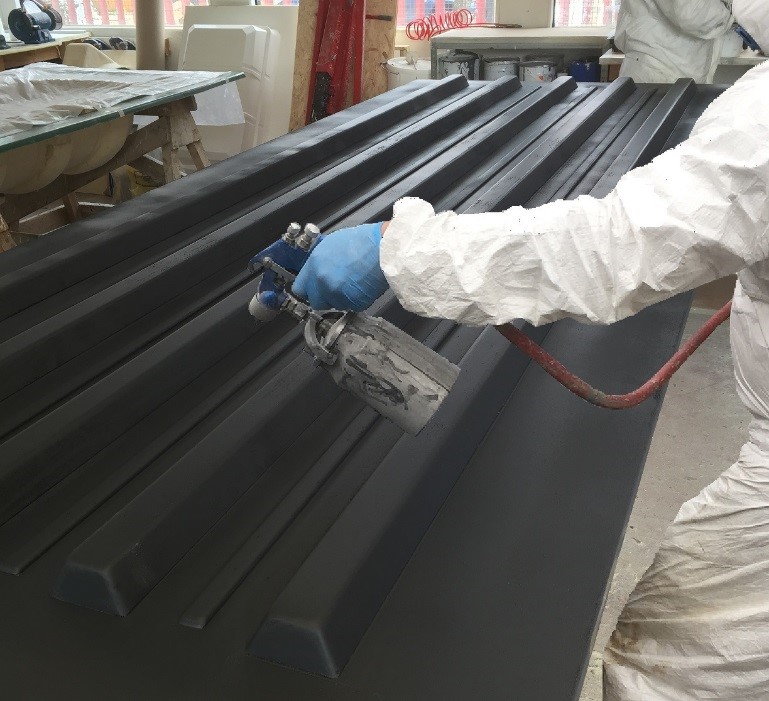
You can then cover with several coats of Durabuild surface primer letting each coat cure before re-appying. The Durabuild is best applied by spray gun, if spraying you will need to add Durabuild thinners to get the right consistency for your gun, add no more than 10% by volume. Add 2% catalyst and mix well before applying the Durabuild. Alternatively you can apply by brush without the need to thin it down however this will leave brush marks that will have to be rubbed.

Maintenance of your spray gun after using Durabuild surface primer:
The Gun should be flushed through thoroughly with acetone before the Durabuild has had chance to cure. It is best to flush the gun through twice. Small parts can be disassembled and soaked in acetone too. Then flush through with warm water. This will prevent resin curing and clogging up your gun.
TIP:
We tend to only brush apply Durabuild for small projects to cut down time needed to prep and clean the gun.

When the Durabuild has cured overnight, this can then be smoothed using fine grades of wet and dry then polished to a very high sheen, (pic 2.), the plug should then be washed with warm soapy water in the event of any residue being left from the polish, then treated with the necessary release agents, recommended is 12 coats of a solid carnauba based wax, applying in 1 hour intervals minimum.
Before using Durabuild read instructions carefully.
Plugs made from porous materials i.e. plaster, wood etc. should be well sealed then rubbed with wet and dry to smooth off any imperfections prior applying release agents, sealing can be in the form of 2 - 3 coats of shellac.
The GRP Mould:
Once the plug is finished and has been treated with release or wax, the laminate layers can be applied. Normal method is used as for any other fibreglass lay-up. The only difference is that the mould must be a lot thicker and rigid than the finished item, usually as a rule of thumb, three times the thickness as the finished part is a good indication.
First apply a layer of catalysed polyester gelcoat, in one continuous film approximately 0.6mm thick, (Pic 3), applying a second layer of gelcoat is an option in the event of any needed rubbing,
When you are making the plug, the finish you achieve will be mirrored on your mould, the mould surface can be reworked with wet and dry paper then polished to a high sheen if needed. However always aim for the best finish on the plug as the less rubbing down you have to do on the finished mould, the better the mould will perform. Ideally you want a high gloss finish to your plug to ensure minimal rework, using porous materials no matter how good you seal will give a substandard mould finish even after polishing.
TIP:
i.e, if you have a poor surface on your plug, let the gelcoat cure to finger tackiness (check the deepest part of the mould) after approximately 2 – 3 hours then apply one layer of fibreglass matting preferably a light mat i.e. 300g csm as this is easier to roll out any air pockets, this layer should be thoroughly consolidated with a metal roller,(Pic 4).
Once the first layer has cured, sand any nibs off and lightly wipe over using acetone on a clean, dye free cotton cloth, the rest of the layers, be it 450g or 600g csm can be applied, do not apply more than four layers at a time as this can generate too much heat and cause shrinkage and other problems. Standard Polyester laminating resin can be used but for best results and on large projects use a low shrinkage tooling resin, such as Optimold, if using optimold read all technical data, and call us for advice on how to use the product, Optimold is the best choice for moulds producing products such as automotive panels where there is no room for distortion or shrinkage of the mould.
On large projects, reinforcements, such as angle iron, aluminium, chipboard, and plywood etc can be bonded to the mould for extra strength. These reinforcements should be placed particularly on flanges where a constant amount of stress would arise from levering the finished items from the mould, also producing ribs on the main body by laminating over a former of cardboard, wood, or polyurethane foam can give extra rigidity, care must be taken to make sure mould has cured first as bonding ribs ect can cause sink marks in mould surface which are very hard to get rid of.
If the plug has any undercuts it will be difficult (if not impossible) to remove unless the mould is made in two halves, for example on a boat hull a split can be made along the keel line. These sections should have flanges that are at least 80mm wide and 50% thicker than the rest of the mould so that these flanges can be bolted together.
Leave the mould to cure up to two weeks at room temperature is desirable, post curing the mould is desirable but not sometimes practical, less if using low shrinkage tooling resin ( 2 – 3 days), releasing a mould too early can cause distortion to the mould.
When the mould is released from the plug any imperfections can be filled or smoothed down. Very little work should be needed if the plug was properly finished.
Treat the mould with no less than 12 waxes, with 1 hour separating each application, TR-102. It is advisable that the tool is broken in first before making any parts, to do this; 1. Coat the mould with PVA release agent, lightly by hand with a sponge is usually sufficient, 2. When dry apply a layer of gel coat, add 3% catalyst as it’s important that this gels quickly. 3. Once the gelcoat has cured apply one layer of 450csm with resin, it’s best to make sure this cures quickly also so add 2 – 3 % catalyst.
4. As soon as this layer cures after 3 – 4 hours peel it off the mould. If the mould is not broken in this way the styrene from the fibreglass laminate can attack the waxed surface of the mould and cause the gelcoat to shear off or worse the part sticking to the mould. Wash the PVA release agent off with warm soapy water then apply a further 5 waxes, again leaving at least 1 hour between each application, after this treatment the mould is ready to use.
Always better to be safe than sorry!
