The Sci-Fi Bee Costume - part 1
Neil Sims (sculptor and artist)
Martin Robson (technical advisor and GRP fabricator)
Early last year we were fortunate to introduce a new member to our team - Artist and sculpture Neil sims. We asked Neil if he would help us promote our arts and craft section and show how these materials can be used and give tips on special techniques etc. After holding a few meetings, we decided on making a start on a mask.
Stage 1
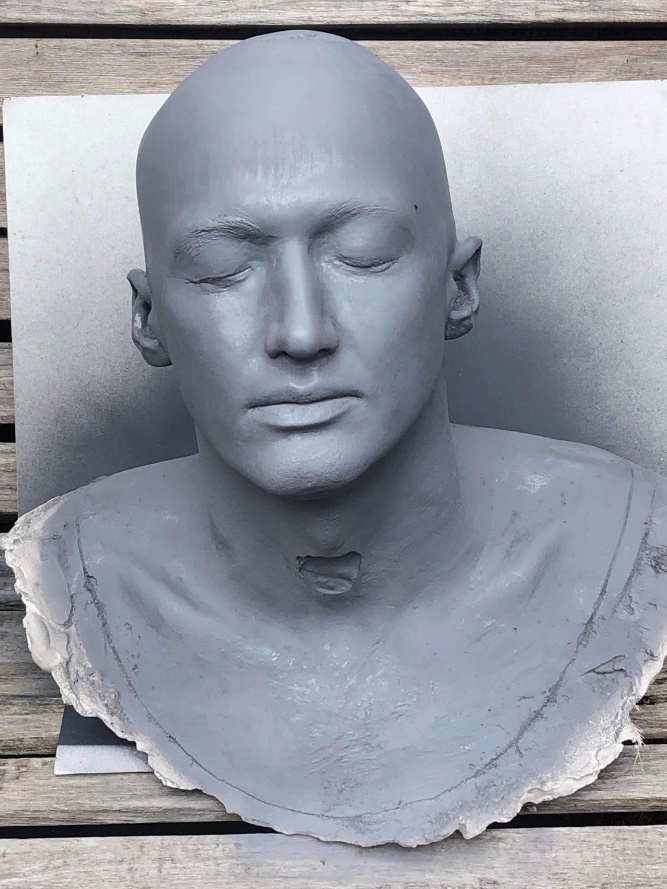
In order to begin the production of this mask, we needed a head cast. We needed to be able to add clay and form our mask muse, which Martin and Neil decided a ‘creature’ of some sorts would be a great creative concept. Although we still hadn’t decided on an idea yet as to what this creature would be, the hunt was on for a victim to choose from our members of staff who would be willing to have his head covered in cold glupe and plaster.
Once we had our volunteer, we set up an area to and firstly had to cover his hair with a skull cap / swimming cap; facial hair such as eyebrows etc were coated in Vaseline to stop alginate or plaster sticking to them. Then we covered his whole head in an alginate mix https://www.ecfibreglasssupplies.co.uk/alginate , using another member of staff ensuring his nostrils were always clear for breathing. The water used to mix the alginate was cold, the colder the better - for increased working time with the alginate mix.
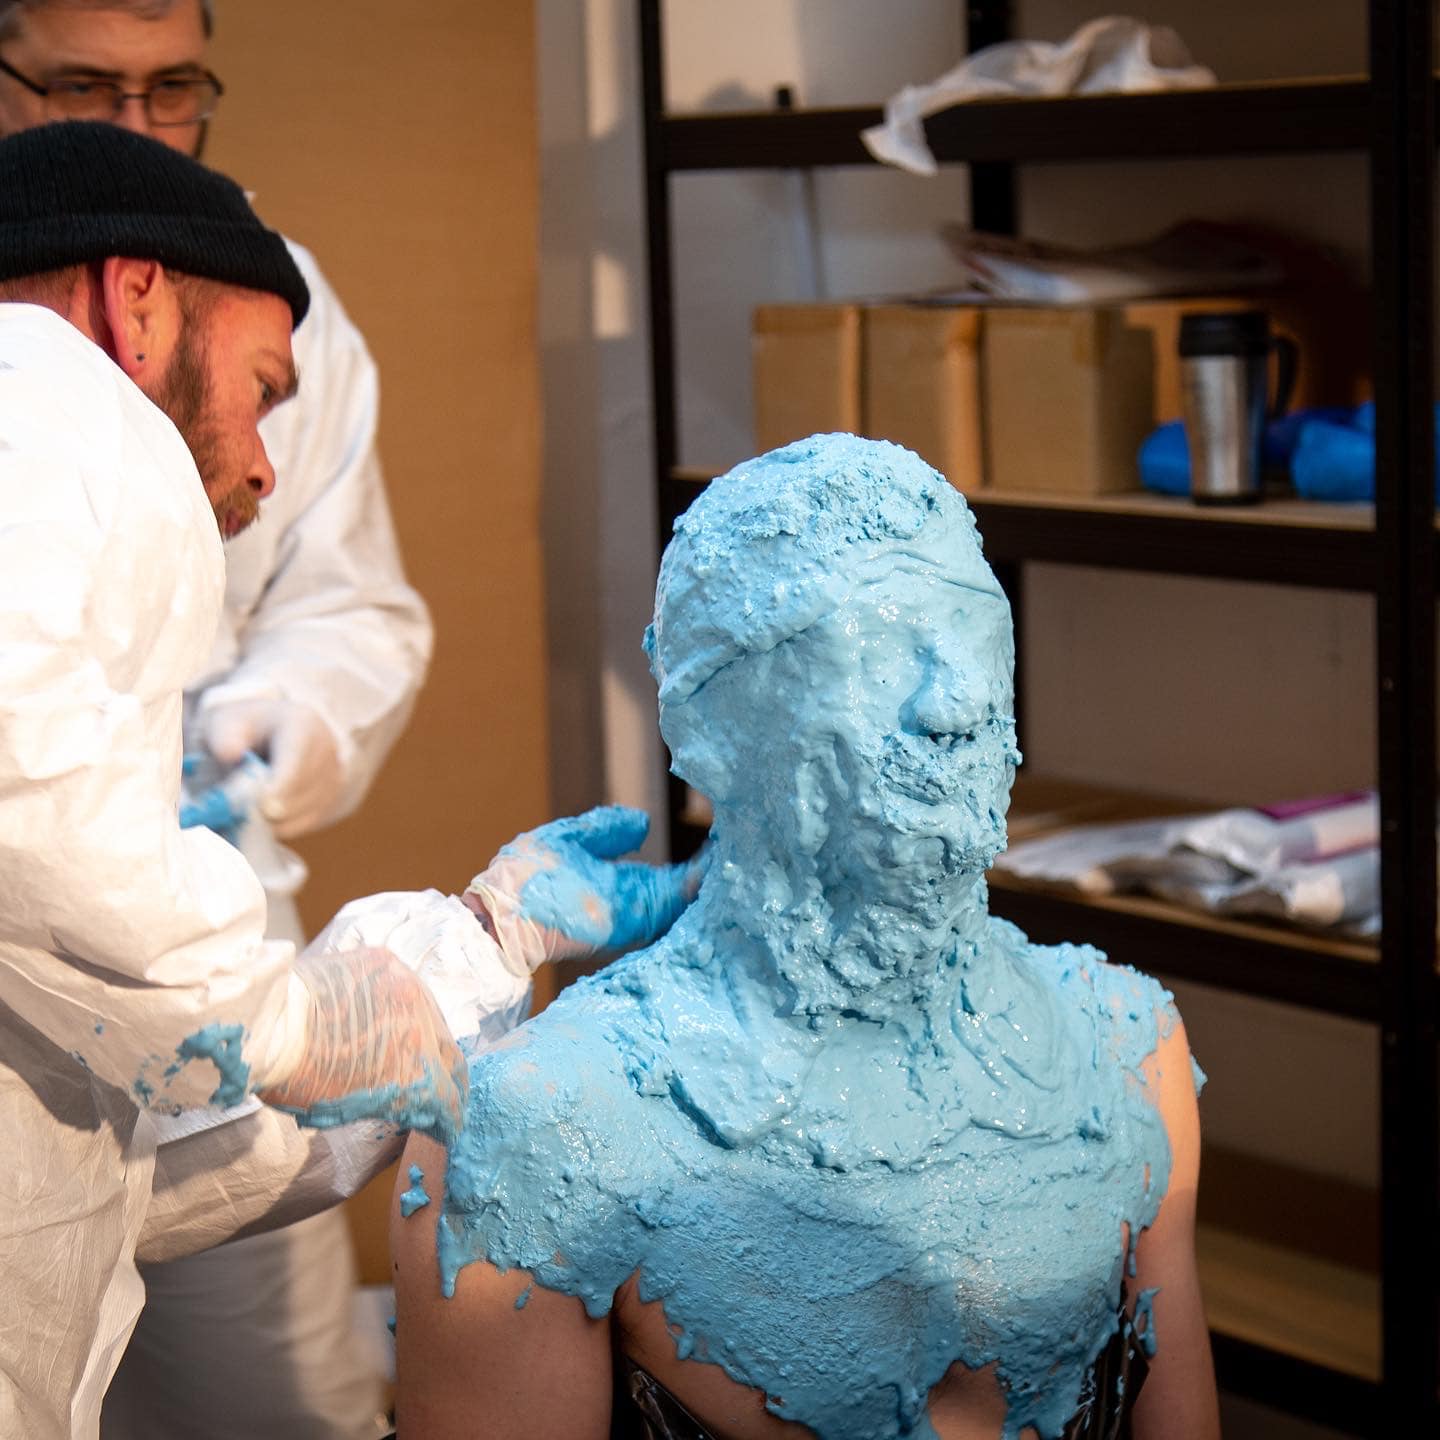
Once the alginate had set, we started to apply the plaster bandage. https://www.ecfibreglasssupplies.co.uk/plaster-of-paris-bandage-15cm-wide We made sure to have a nice straight line along where the joins should be, and ensuring we built somewhat of a wall with rolled pieces of plaster bandage to make an obvious releasing area and joining flange for when we come to pout the two halves back together again.
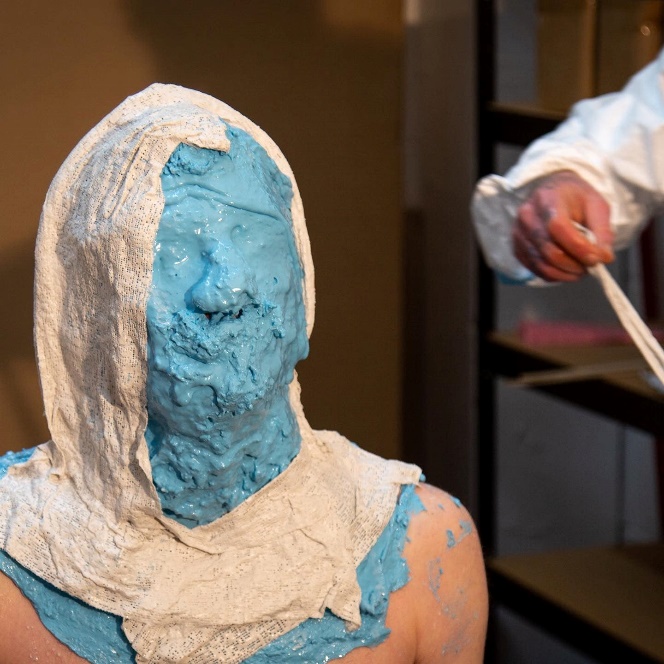
We repeated this process at the back of the head also and once the plaster was set it was time to remove the two-part plaster shell and the alginate mould.
At this point we needed to have the volunteer lean forward so we could ease the shell off whilst also peeling the alginate moulding away. keeping it in the shell as best we could and using the front shell as a support, so that we didn’t drop or split the alginate, we made a few cuts along the back into the alginate whilst being careful not to harm the volunteer with the scissors. These cuts allowed the volunteer to remove his head easily. Then the back of the shell was replaced, and the alginate carefully reassembled inside.
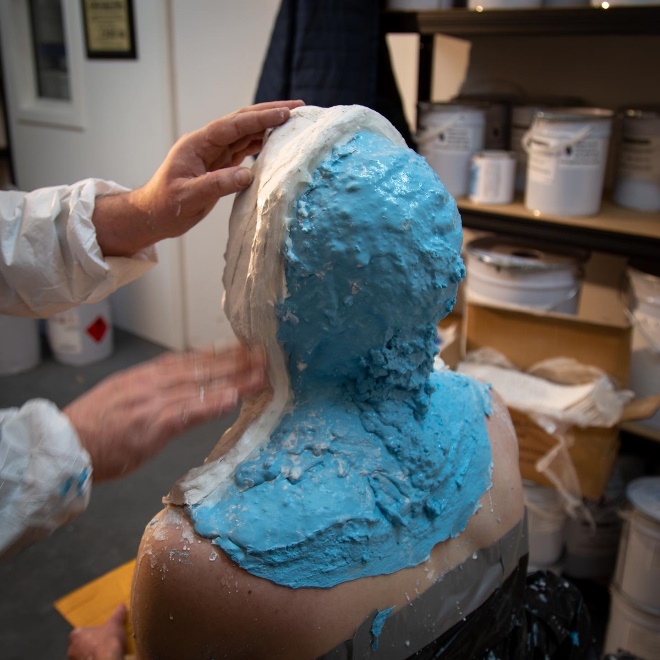
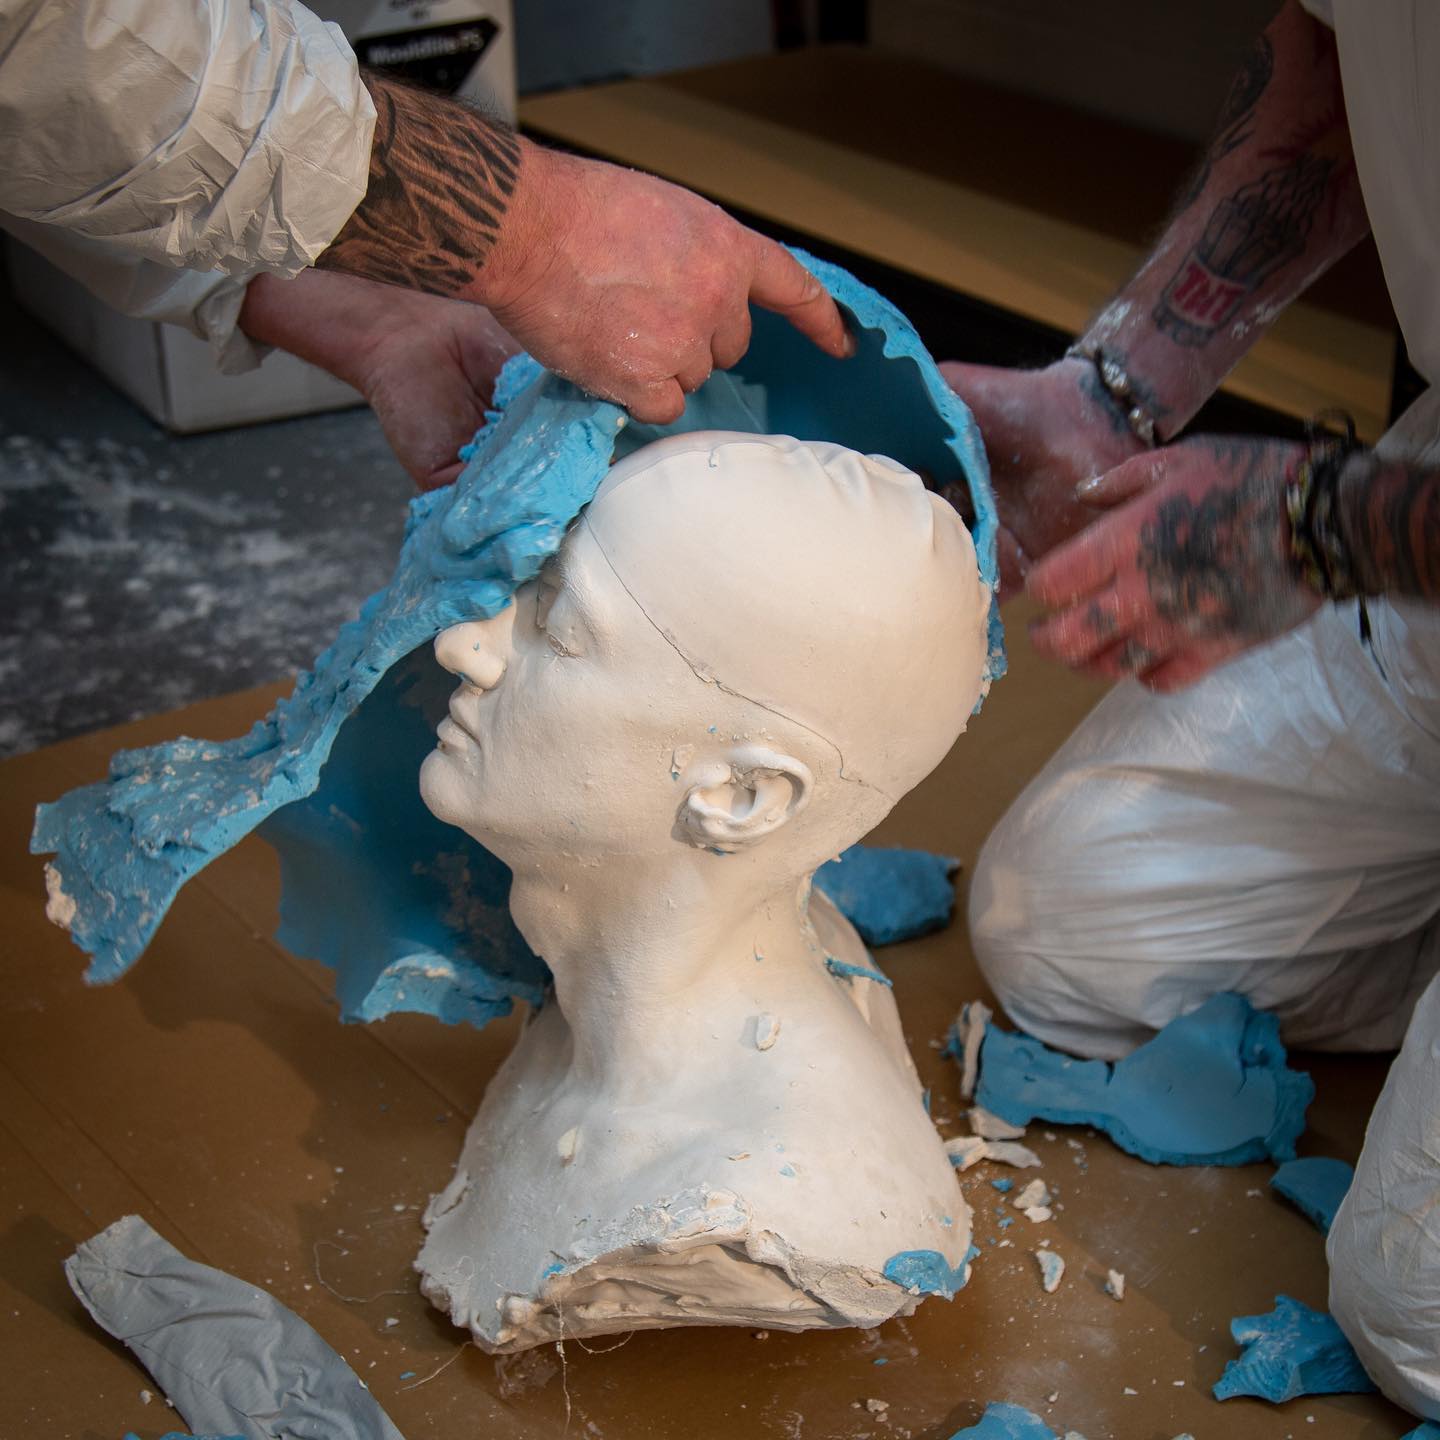
The shell was placed upside down into a bucket for support with the alginate mould cradled inside. Then we mixed casting plaster powder https://www.ecfibreglasssupplies.co.uk/fine-casting-plaster-plus and water and poured this into the mould. Once set we removed the mould to reveal a plaster replica of our volunteer’s head.
To Bee or not to Bee
Now back to the devising an aesthetic for our creature. We went through many ideas for this creature, from animals to a mutant punk rock pig, but these were either ideas that were done before or created too much work (such as plucking individual hairs into the mask!)
Neil is a big fan of sci-fi, especially the Doctor Who series of which he has worked on many sculpts and busts. He also has a keen interest in bees and how they work and produce honey. Thus, after a night on creative drinks (beers), we came up with the idea of creating an evolved humanoid bee – something that looks like it came straight from Doctor Who. Nevertheless, we didn’t stop there in our beverage infused brainstorming session. We said “why just stop at a mask? Let’s make a full creature, so we can display all our materials and incorporate within the full suit”. The next day, with a clearer mindset, Neil was quickly on it and drew up a few concept drawings for our character and had even primed the head cast ready to start: -
Beehive yourself Neil!
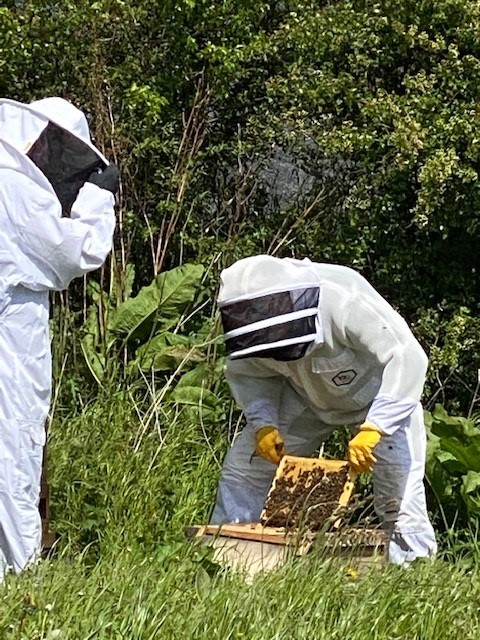
Next, we took a trip out to a local Beehive so Neil could even research and look at the bees in detail.
We studied the bees for a short while, and Neil got to see his first Queen Bee up close and personal. It was then we decided we would model the creature around that of a Queen bee and started to plan how we would go ahead with the design.
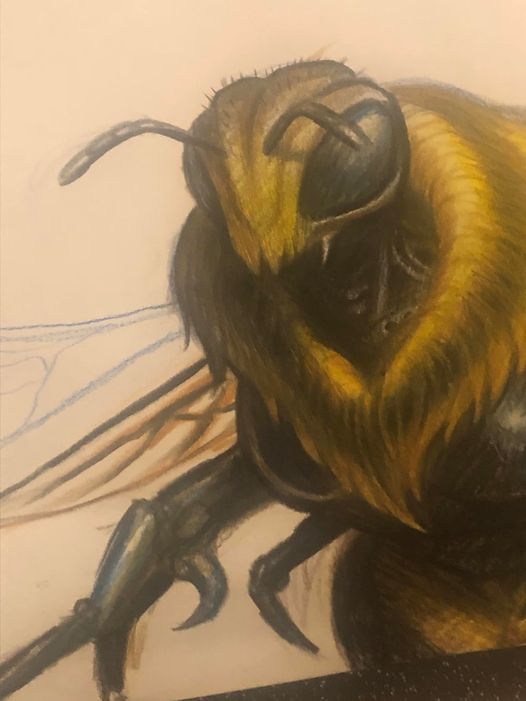
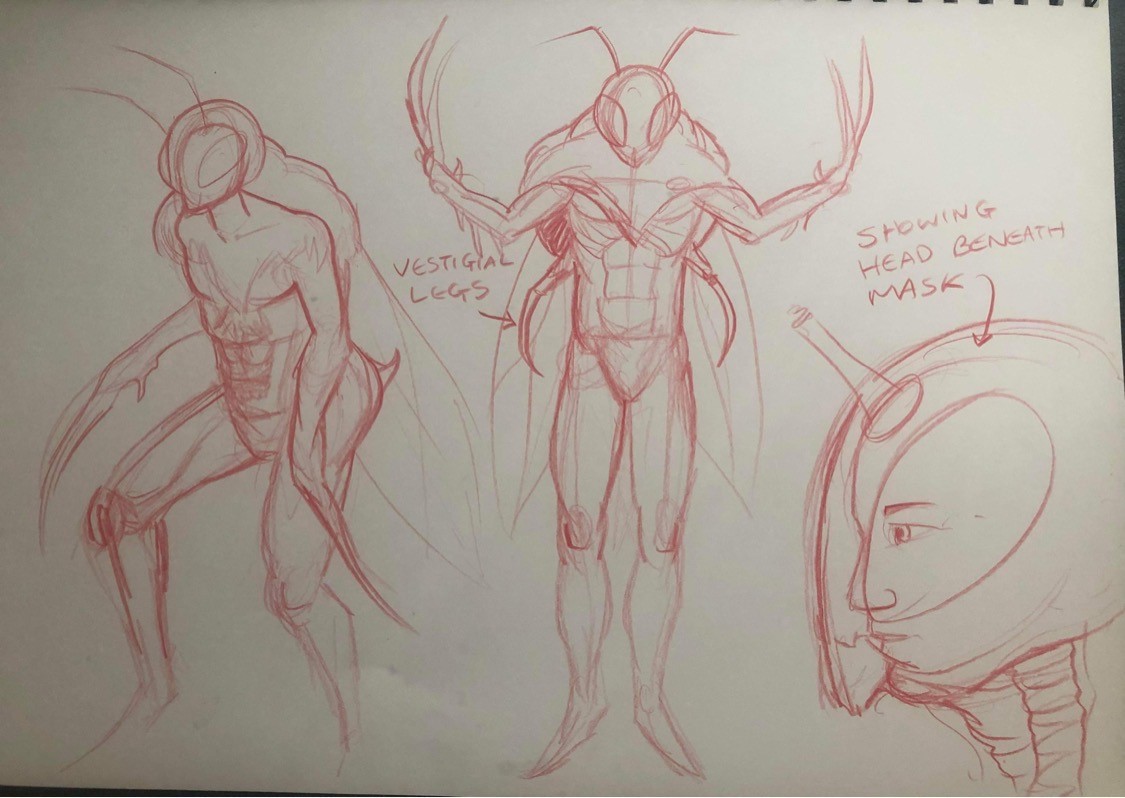
Humanoid queen bee concept drawing by Neil sims.
We didn’t want this looking like some fancy-dress store-bought costume, we wanted it to look something worthy of a sci-fi series. First thing was to ditch the six legs of the bee, we didn’t want some suit with strings attached to legs that we couldn’t control independently, and we do not have the expertise of an animatronics expert. So, we decided on the middle legs being vestigial, a useless remaining limb left over from evolution, much like a useless tail bone in humans or wings on a flightless bird.
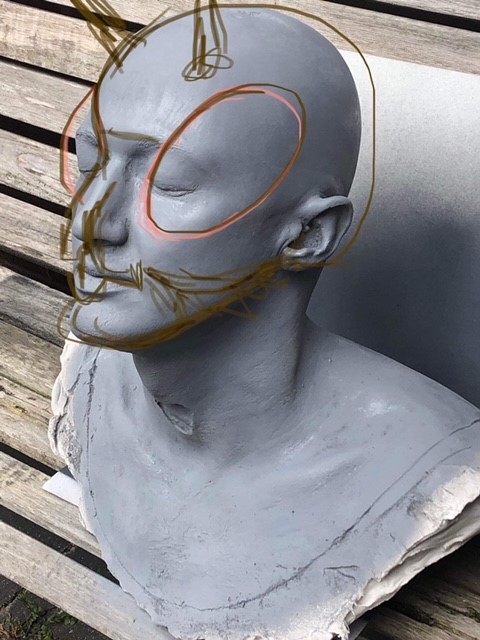
Buzzing a-head
Work has now started on the head sculpt. Neil began by using the paster head former to build up layer upon layer of medium Chevant NSP modelling clay, see link below:
https://www.ecfibreglasssupplies.co.uk/clays-and-moulding-materials
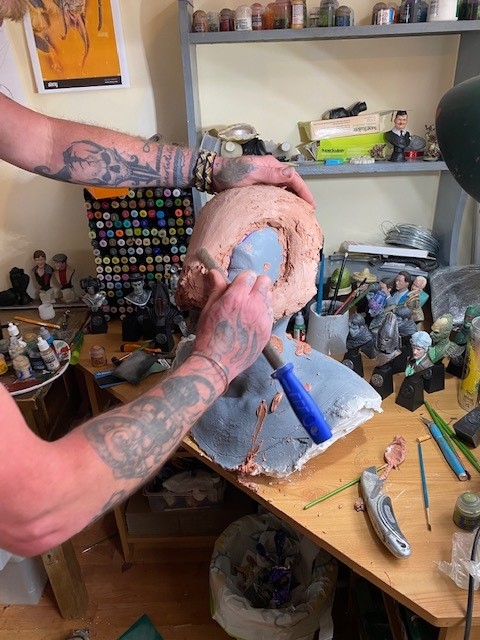
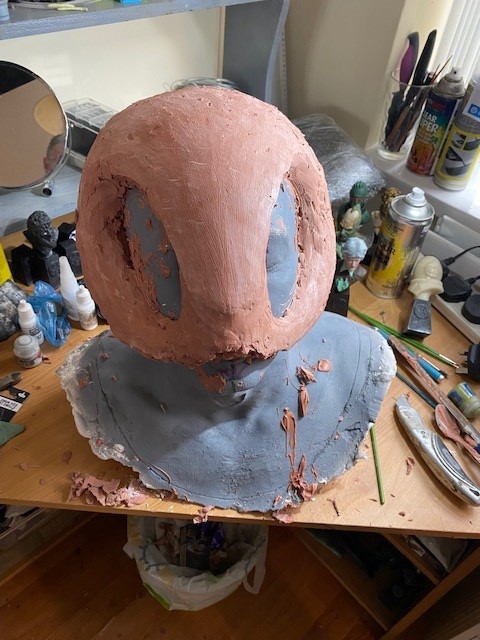
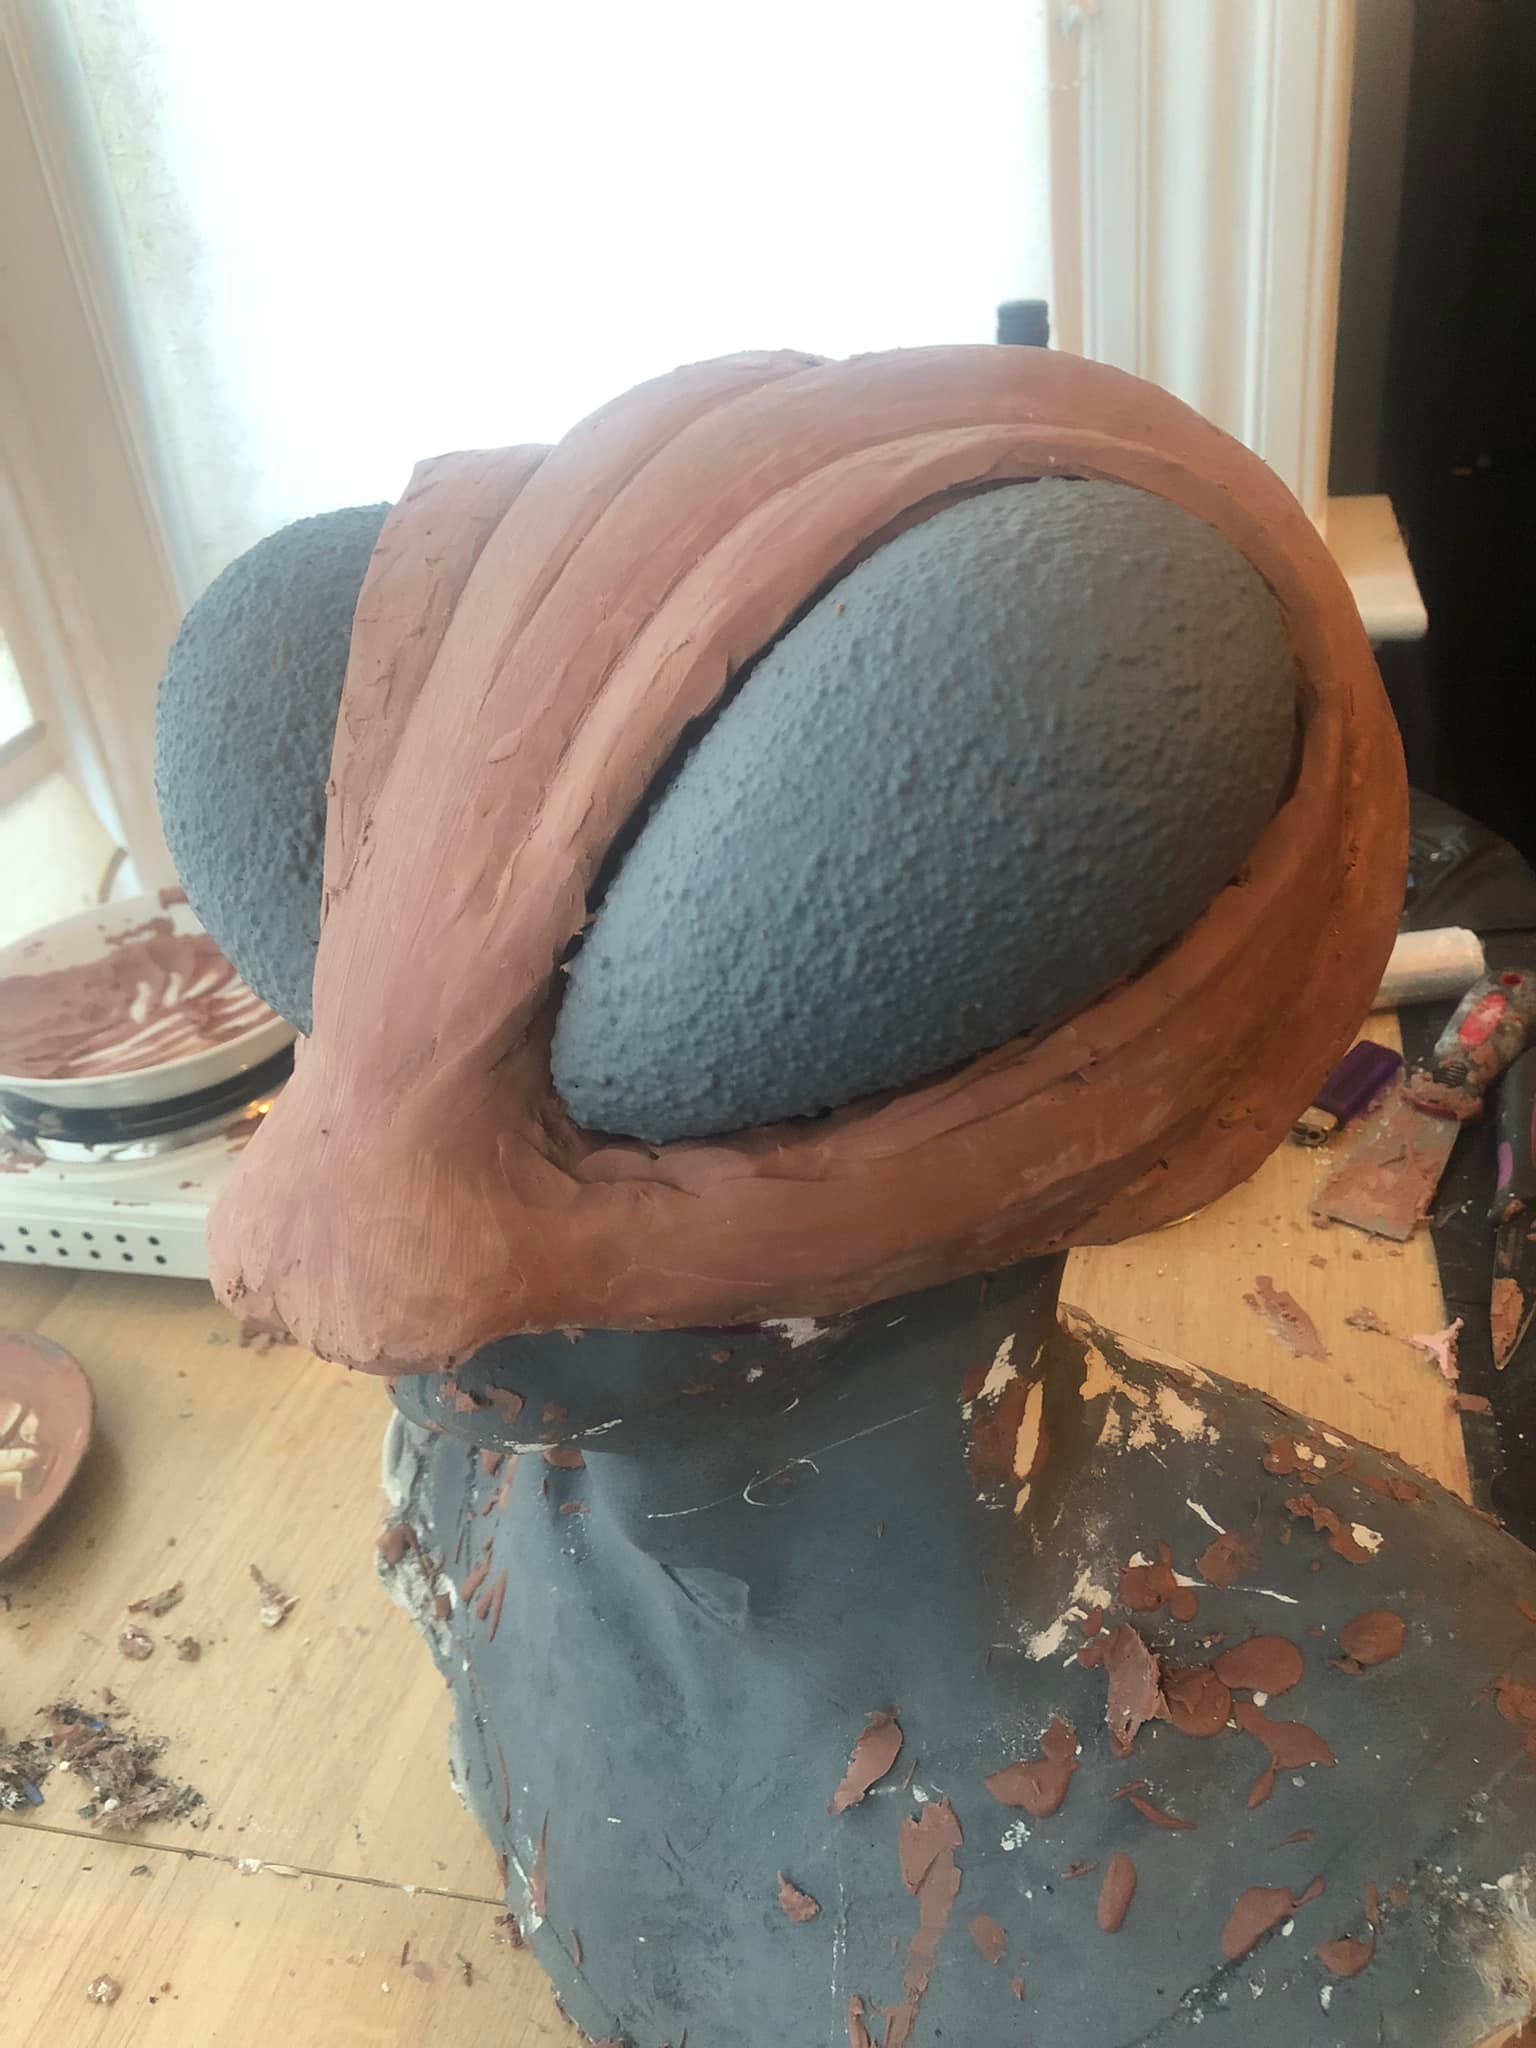
Once there is enough of a build, and a basic shape to give outline to the proportions and eye sockets, Neil can then add more clay to build more detail.
1000s watching us!
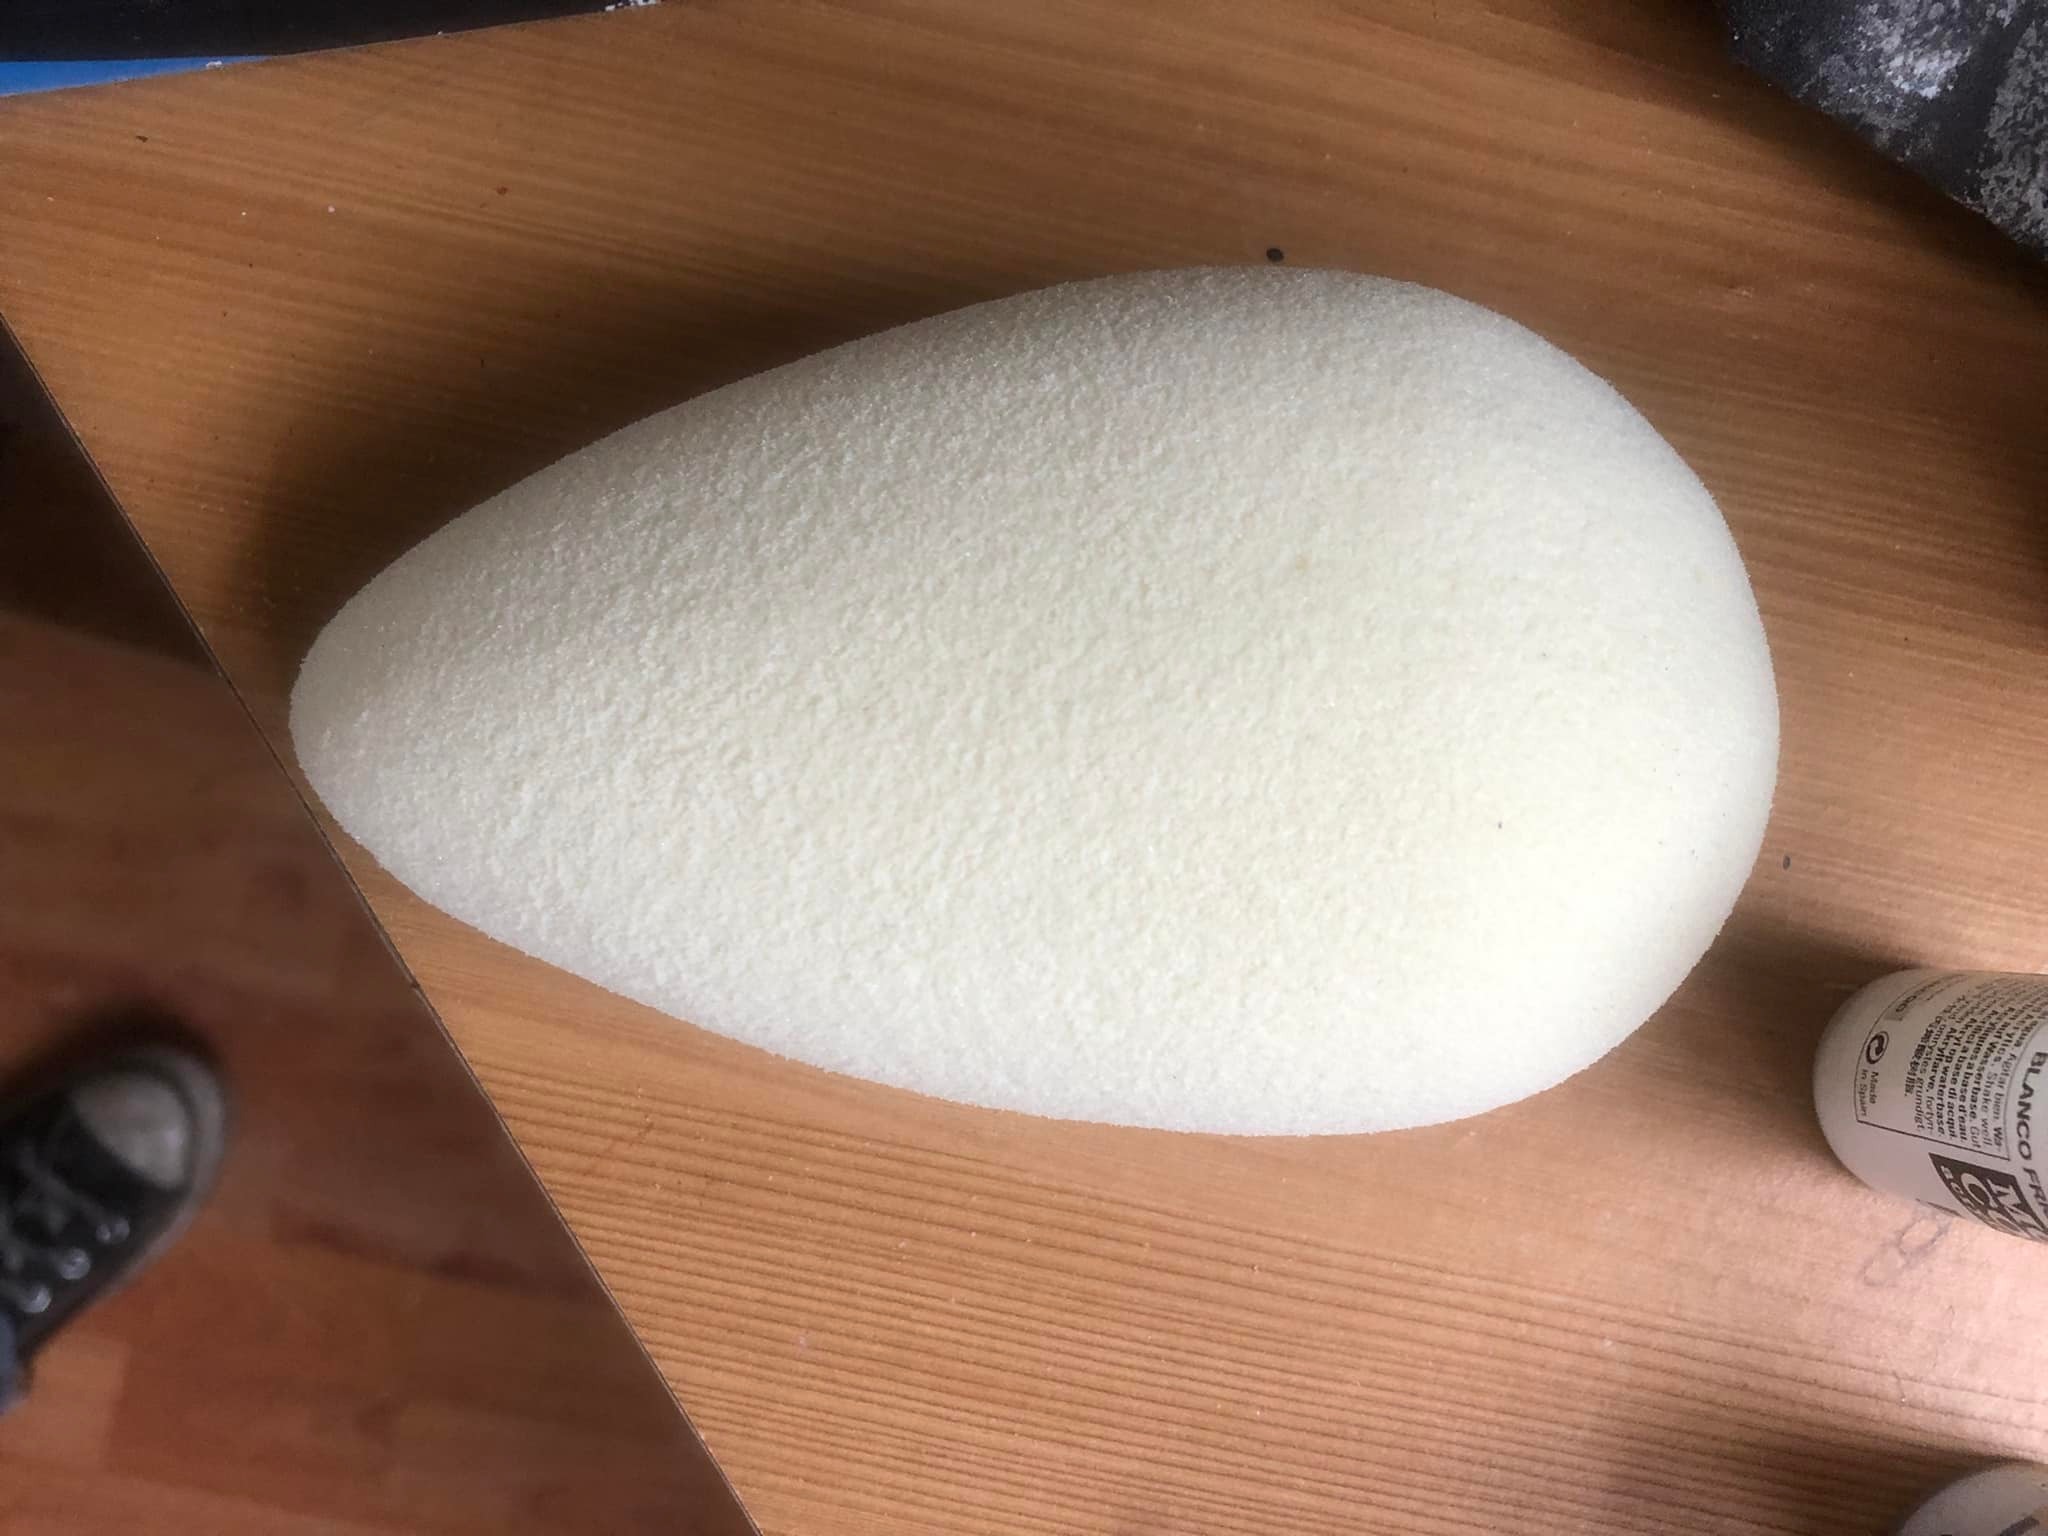
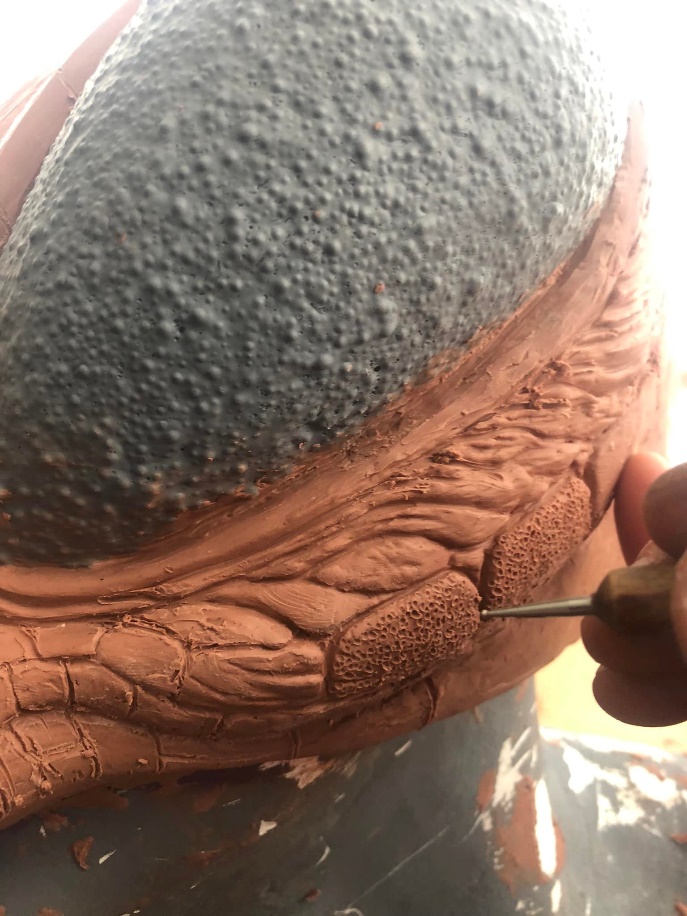
Next - we turn our attention to the eyes. We needed to get the eyes sorted before producing any more detail to the rest of the face. A bee’s eye is made up of hundreds of ball-like cells. After a lot of thought, we decided to carve the basic shape from a foamblock then glue on loads of 2mm steel ball bearings to get this cell structure
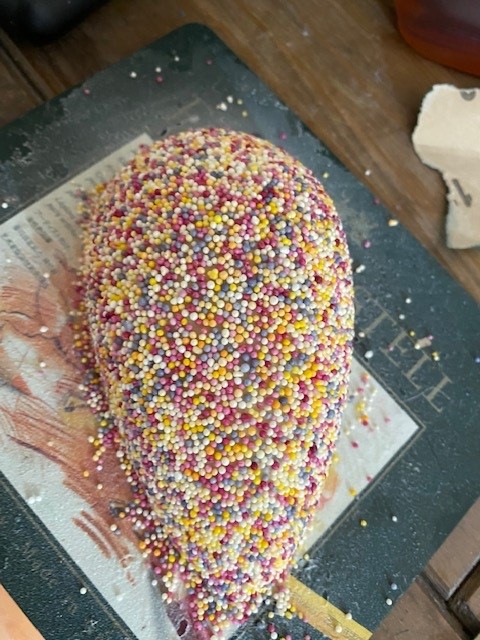
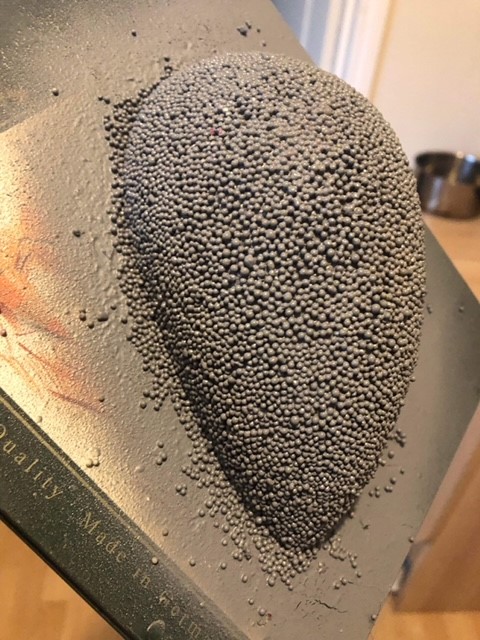
However after ordering a few hundred of these steel balls and seeing just how small of an area these would cover on the model, along with how expensive it was going to be, we quickly abondond the idea. Then we came up with the idea of using ball type cake decorations and neil found some 100s and 1000s which are tiny ball cake decorations. This took a lot of sorting through to get the uniformed 2mm ones picked out but it was worth it in the end. The finished part was then primed and installed onto the sculpt.
We’re in Bees-ness now!
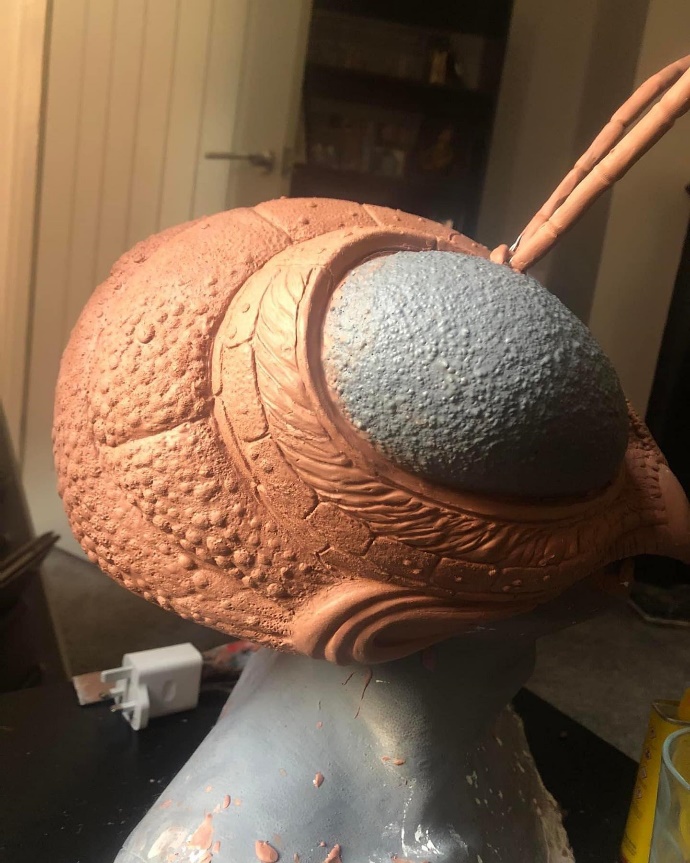
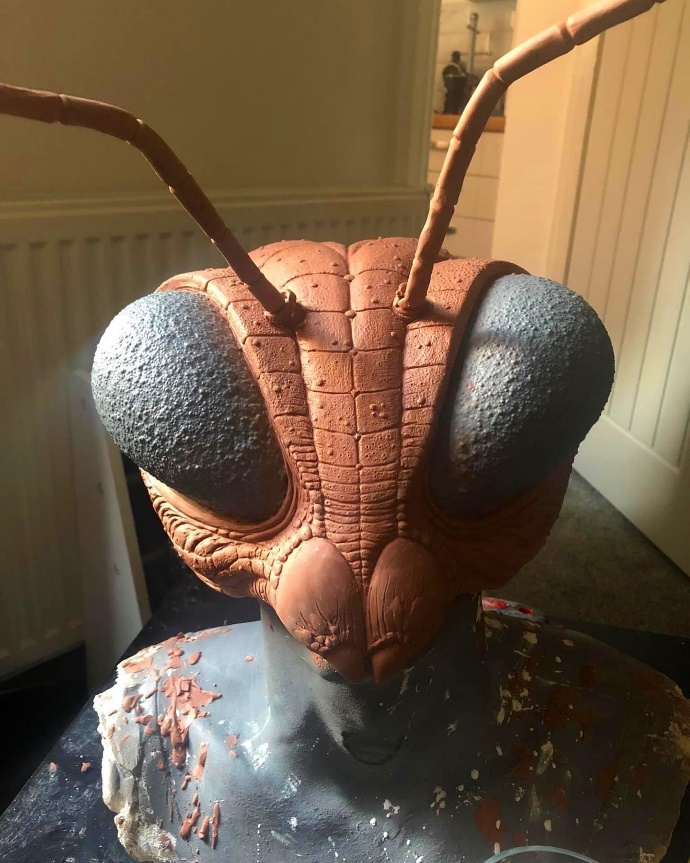
Now that the eyes are installed, Neil can apply the finer details. Neil wanted to methodically apply the detail and avoid using any of those textured stamps that you can get for jobs like this - he finds them overused in the special effects industry. This really paid off and avoids making the sculpt look far too uniform and unnatural on the skin texture, it gives it a much more organic look.
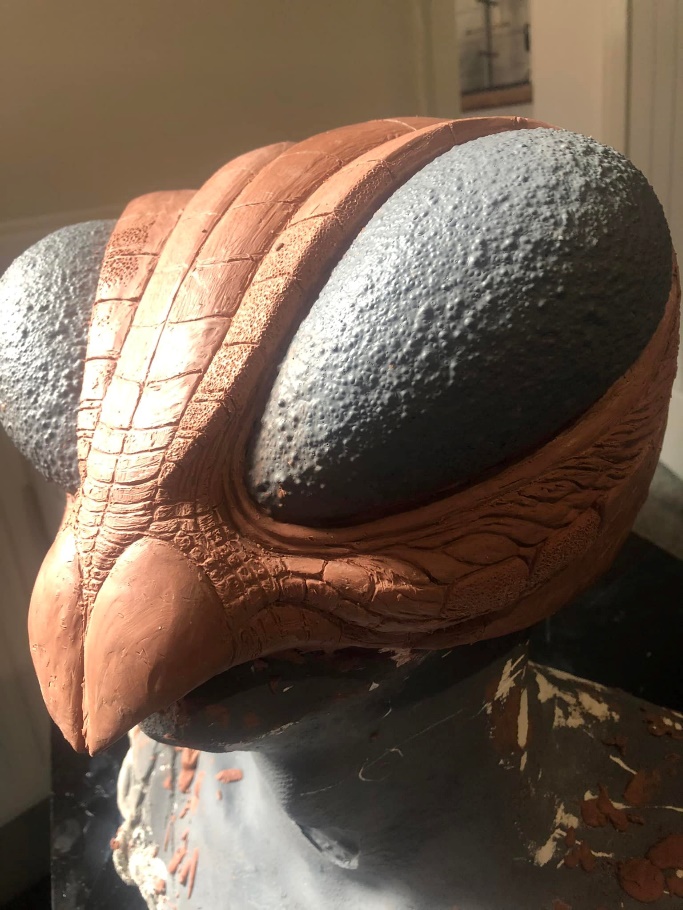
Wire and more Chevant was used to create the antennas as shown below. We will be making the antenna separately from the main mask and will show the moulding process later.
Buzzing with our new wings
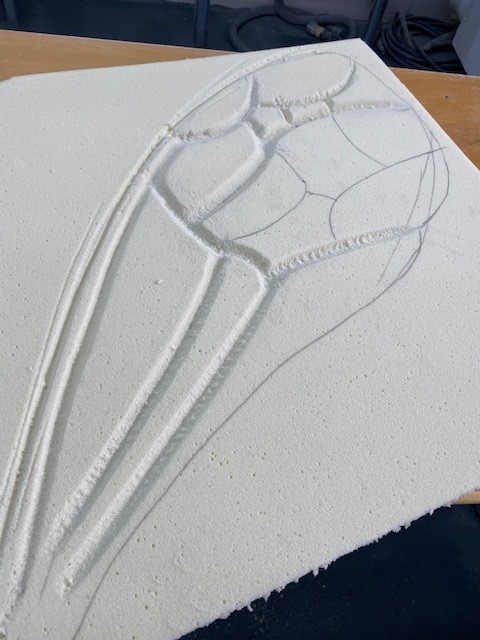
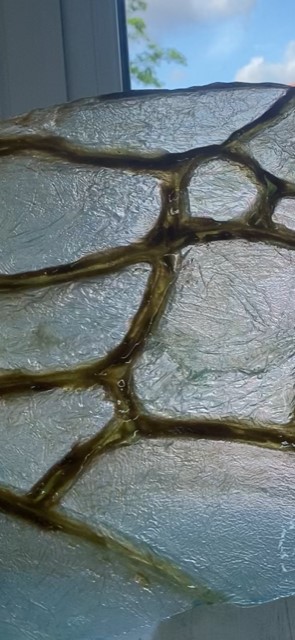
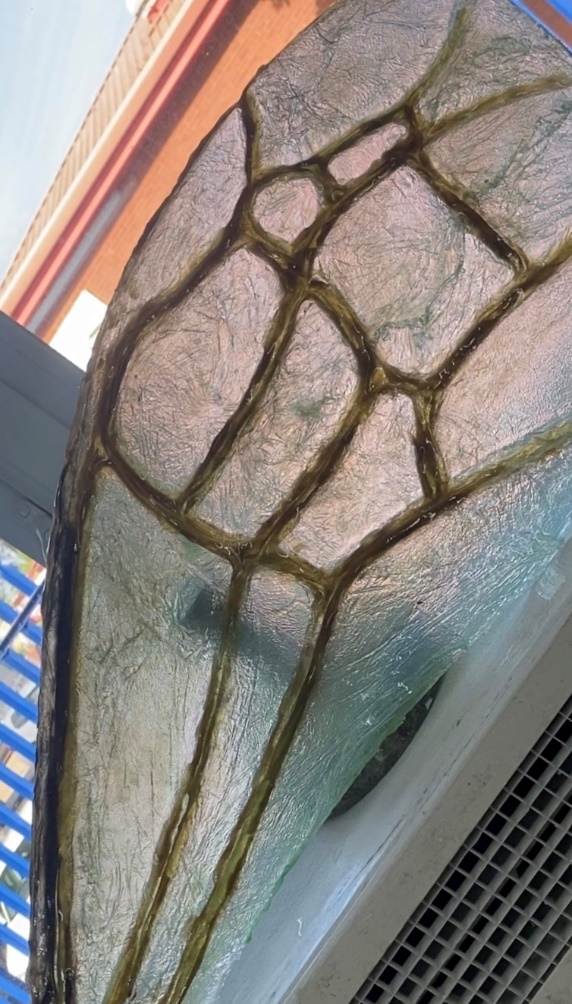
Whilst Neil is busy with the sculpt, Martin began experimenting with the wings. After seeing many clear laminates done in polyester resin and fibreglass, he remembered that the fibres encapsulated in resin (especially when over stippled and broken up) resembled the swirls that can be seen in the clear section of a bee’s wing.
Then, a former was made from foam covered in spray glue then cling film, which again should add to the crinkled texture, this was then coated with clear gelcoat. https://www.ecfibreglasssupplies.co.uk/clear-polyester-gel-coat-inclusive-of-catalyst
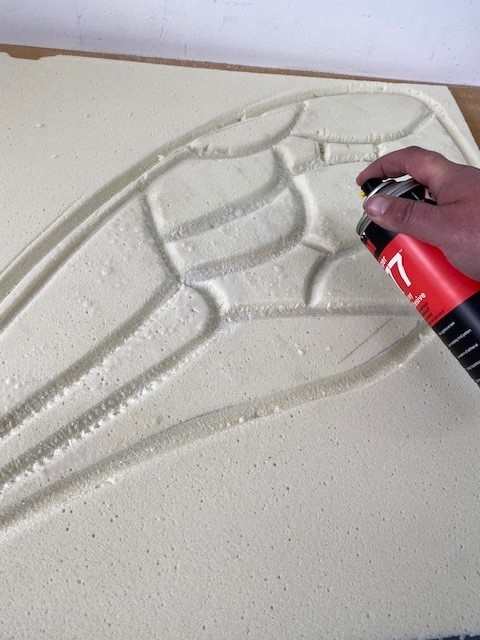
Once cured he gave this a layer of powder bound 300g fibreglass and used water clear casting resin to wet it out adding 4% catalyst which is needed in water clear polyester casting resin to help it cure hard. Water clear resin tends to be used for casting thicker objects such as paperweights etc and is not usually used to lay fibreglass. This is due to it under curing and staying very tacky, hence the reason to increase the catalyst to help it exotherm. Once cure he removed it from the foam former and peeled away the clingfilm revealing a clear laminate.
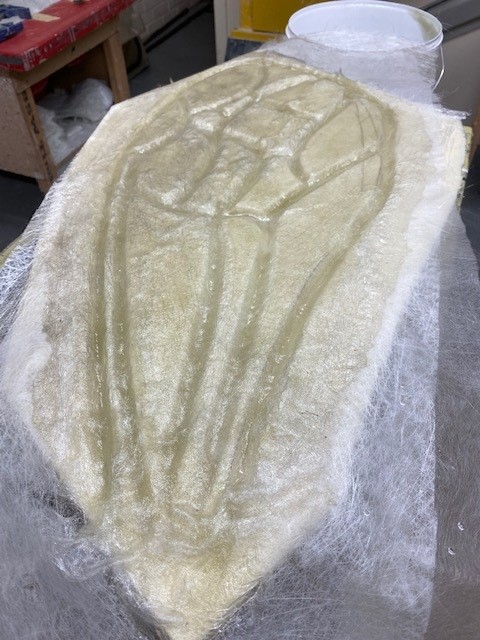
Then Martin mixed some water clear resin with 2% MW wax https://www.ecfibreglasssupplies.co.uk/mw-solution-wax-in-styrene and added some mica powders https://www.ecfibreglasssupplies.co.uk/mica-powders before catalysing with 4% catalyst and painting both sides to give the wing a bit of a shimmer.
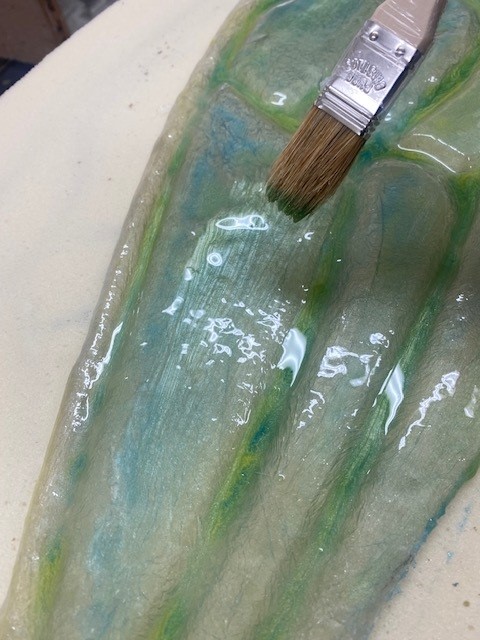
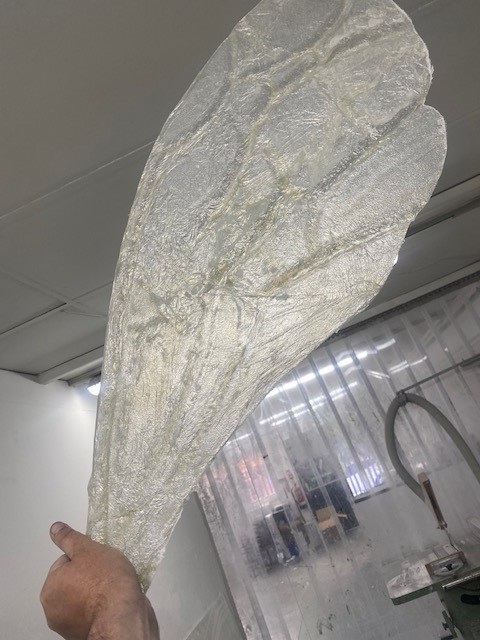
The shimmer didn’t necessarily reach their expectations, but the colour was great.
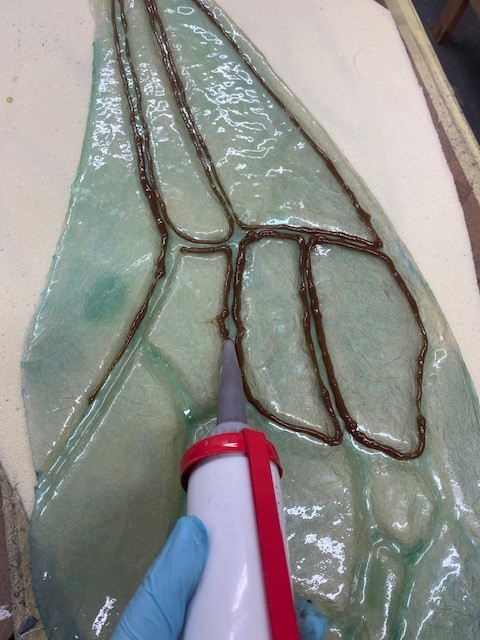
He then pigmented some gelcoat brown with polyester pigment https://www.ecfibreglasssupplies.co.uk/polyester-pigments-ral-colours and filled a empty mastik cartridge with the mixture https://www.ecfibreglasssupplies.co.uk/mastik-gun-empty-cartridge-400ml The same thing was also done with some gelcoat and transparent yellow pigment to fill the areas where the veins were formed.