Quality Control in GRP
Common faults
Many complaints concerning the appearance and performance of GRP mouldings stem from the basic cause that the resin is under cured. There are, however, several problems which are met from time to time in the form of visible flaws or other defects and which deserve closer examination. The remedy in each case will become apparent from the analysis of the causes.
Wrinkling
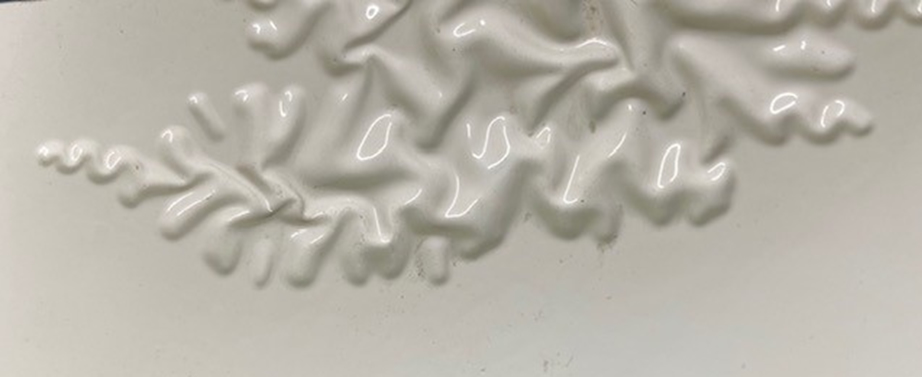
This is caused by solvent attack on the gel coat by the monomer in the laminating resin since the gel coat is under cured. Wrinkling can be avoided by ensuring that the resin formulation is correct, that the gel coat is not too thin and by controlling temperature and humidity and keeping the work away from moving air — especially warm air. If the workshop is equipped with hot air blowers, these should be directed away from the moulds.
Pin holing
Speckling Surface pin holing is caused by small air bubbles which are trapped in the dissolved binder) gel coat before gelation. It occurs when the resin is too viscous, or has a high filler content, or when the gel coat resin wets the release agent imperfectly
Poor adhesion of the gel coat resin
Unless the adhesion of the gel coat to the backing laminate is very poor, this defect will be noticed only when the structure is being handled and pieces of gel coat flake off. Areas of poor adhesion can be detected sometimes by the presence of a blister, or by local undulations in the surface when it is viewed obliquely. Poor gel coat adhesion can be caused by inadequate consolidation of the laminate, contamination of the gel coat before the glass fibre is laid up or, more generally, by the gel coat being left to cure for too long.
Spotting
This fault takes the form of small spots all over the gel coat surface of the laminate. It is usually due to one of the ingredients of the resin formulation not being properly dispersed.
Striations
This fault is caused by pigment flotation and is most likely where the colour used is a mixture of more than one pigment. The remedy is thorough mixing or the use of a different pigment paste.
Fibre pattern
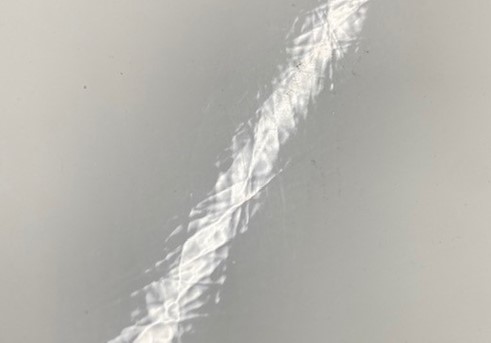
The pattern of the glass fibre reinforcement is sometimes visible through the gel coat or prominently noticeable on its surface. This usually occurs when the gel coat is too thin or when the reinforcement has been laid up and rolled before the gel coat has hardened sufficiently, or when the moulding is removed too early from the mould. As shown below you can see the fibre print pattern as the panel catches the light.
'Fish eyes
On a very highly polished mould, particularly when silicone modified waxes are used, the gel coat sometimes 'de-wets' from certain areas leaving spots where the gel coat is almost non-existent. This shows up as patches of pale colour usually up to in. in diameter. It can also occur in long straight lines following the strokes of the brush during application. This fault is rarely experienced when a PVAL film is correctly applied.
Blisters
The presence of blisters indicates that there is delamination within the moulding and that air or solvent has been entrapped. Blisters which extend over a considerable area may also indicate that the resin is under cured, and this type of blister may not form until some months after moulding. Blisters can also occur if the moulding is subjected to an excessive amount of radiant heat during cure. A possible cause of this defect is the use of MEKP rather than cyclohexanone peroxide paste. If on the other hand the blister is below the surface, the cause is likely to be imperfect wetting of the glass fibre by the resin during impregnation. This would be since insufficient time had been allowed for the mat to absorb the resin before rolling. Blisters of this kind can usually be detected by inspection as soon as the moulding has been removed from the mould
Crazing
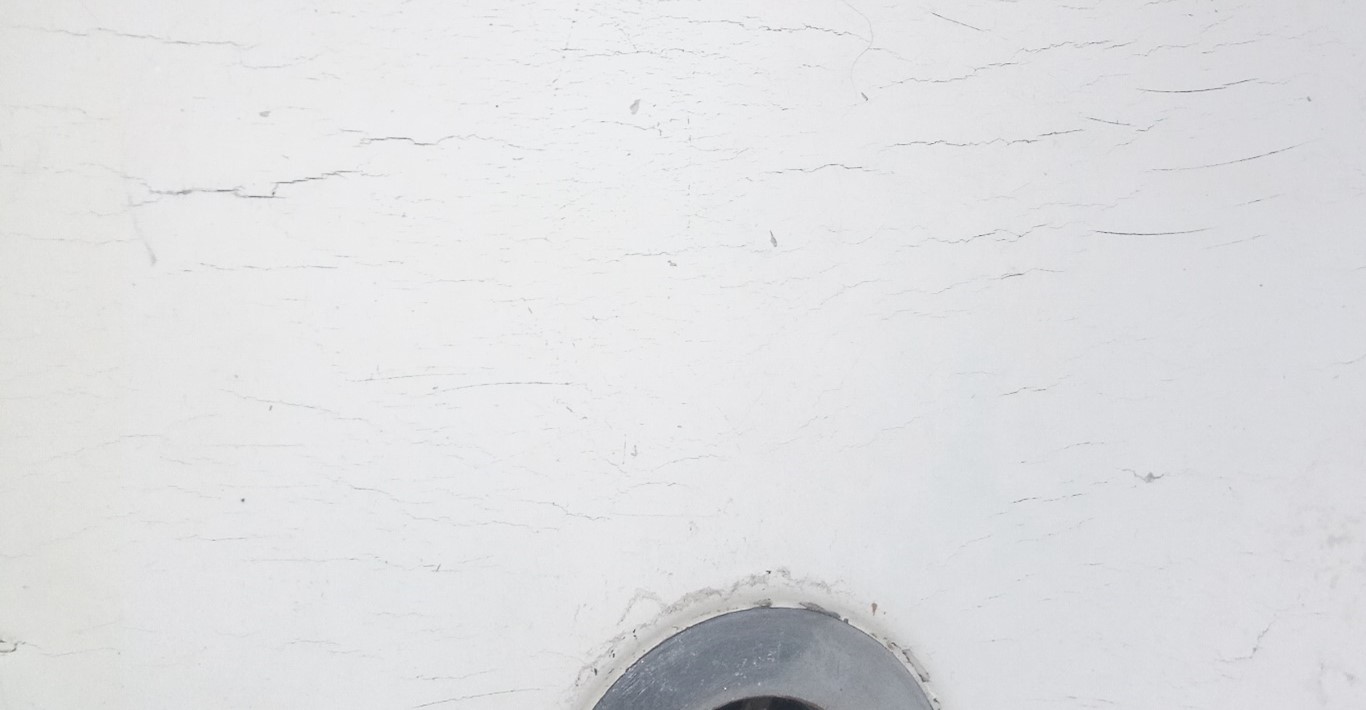
This is the result of having an over thick gel coat and occurs when the laminate has received a reverse impact. Gel coats should never be more than 0•020in mm) thick. Ot can also be caused by years of impact or stress in the area
Internal dry patches
These can be caused by attempting to impregnate more than one layer of mat at a time. The presence of internal dry patches can be readily confirmed by tapping the surface with a coin.
Poor wetting of the mat
The cause of poor wetting of the mat is either the use of insufficient resin during lay-up, or inadequate consolidation of the lay-up. This defect is normally apparent on the reverse face of the laminate only, i.e., the side without a gel coat. When correctly wetted this will have a glazed appearance because the fibres are coated with resin.
Leaching This is a serious fault. Leaching occurs after exposure of the laminate to the weather and is characterised by a loss of resin from the laminate leaving the glass fibres exposed to attack by moisture. Leaching indicates either that the resin used has not been adequately cured, or that it is an unsatisfactory resin for that application
Yellowing GRP laminates yellow after a period of exposure to sunlight. It is generally only slight but can be considerable on translucent roof sheeting and white pigmented laminates. It is a surface phenomenon due to the absorption of ultra-violet radiation. For this reason, most sheeting resins contain UV stabilisers which reduce considerably the rate of yellowing. Yellowing does not affect the mechanical properties of the laminate. Laminates with a high resin content discolour less rapidly than those having a high glass content. If a sheeting laminate has been fully cured, has a resin content of at least 75 0 0 and if the Cellophane is removed before it is exposed to heat or strong sunlight, the degree of yellowing even after prolonged exposure will be negligible.
Repair Some moulding faults can be quickly dealt with at the trimming and finishing stage before painting. They will present no difficulty since all the materials and equipment will be available. All loose resin and reinforcement should be removed, and the affected area cleaned with Acetone and dried. Some-times it will be necessary to roughen the surrounding area with abrasive paper to obtain better adhesion. For superficial damage, i.e., damage to the gel coat only, activated resin or gelcoat should be applied to the damaged area and allowed to set. A layer of Mylar polyester release film often helps to keep the resin in position and gives a smooth finish to the surface. It is always advisable to apply a rather thicker film of resin or gelcoat than necessary to allow for shrinkage. When the repaired patch has hardened the resin can be dressed back to the correct contours of the moulding.
To make gelcoat repairs easier ECF supply all you need in a kit form, see our gelcoat repair kits here : GELCOAT REPAIR KIT and also here see our YouTube instruction video https://youtu.be/6_Y1UavwhzI When damage is not confined to the surface, resin and reinforcement should be laid up, overlapping the edges to ensure good adhesion over a wide area. When the laminate is fractured, the whole of the damaged area should be cut out and the inside edge of the hole chamfered in such a way that the hole is larger on the gel coat side than it is on the reverse. The surrounding area should be roughened to obtain good adhesion. Where the surface area is large, a temporary mould should be built up on the exterior surface. Release agent is applied to this and allowed to dry. For smaller holes a piece of Cellophane can be fixed over the hole with adhesive tape; this will act both as a mould and as a release agent. Where the damage is very extensive the moulding is best repaired by replacing it in its original mould.
A slightly different method of repair can be used for laminates where a strengthening rib can be added. The hole is chamfered to be larger on the inside than on the gel coat side. The actual repair is carried out as described earlier, except that it need be no thicker than the laminate. One or more reinforcing ribs are then laminated over the repaired area overlapping it as far as possible.
Inspection
The success or failure in producing a high-quality reinforced plastic mould-ing or laminate depends to a large extent on the fabricator's understanding of the nature of polyester/glass fibre structures and of the importance of the various stages during fabrication.
The essential difference between reinforced plastics and almost all other structural materials is that, whilst the chemical composition and properties of other materials, e.g., steel or aluminium are mainly determined by the manufacturer, with reinforced plastics the fabricator determines these properties himself. In other words, he makes his own material. Inspection therefore covers a much wider field than usual and must be considered at every stage of fabrication. Adequate safeguards must be taken to eliminate as many variables as possible and to ensure consistency both in materials and fabrication processes.
When mouldings are inspected visually the following points should be specially scrutinised:
-
Surface imperfections and general appearance.
-
Freedom from air bubbles entrapped in the laminate. The use of unpigmented resin makes visual inspection much easier.
-
Dimensions.
The actual testing of laminates presents rather more problems. It can be roughly divided into two sections, viz. mechanical testing, and chemical testing. The most important mechanical tests for reinforced plastics are:
-
Ultimate tensile strength.
-
Bend strength (cross-breaking or flexural strength).
-
Modulus in bending.
-
Impact strength.
Too much importance should not be attached to high tensile strength figures. With some types of glass fibre reinforcement, it is possible to obtain laminates with a high glass to resin ratio. Although such laminates have a high tensile strength, they are usually too thin to be rigid enough and are therefore unsatisfactory. Minimum thickness is therefore another factor to consider. Moreover, a polyester/glass fibre laminate with a lower resin content will have poorer long term weather resistance.
Most tests, both mechanical and chemical, are destructive, i.e., a piece must be taken from the laminate for the test. It is important that this be cut at least 1 in. from the edge of the laminate since variations in resin content tend to be particularly exaggerated at the edge. It is also essential for all tests to be carried out when the laminate has reached maturity and is stable. Samples can be post-cured for 3 hours at 800C to reach stability more rapidly, but at least 24 hours should have elapsed after gelation before they are post-cured.
Resin/glass ratio
The mechanical and chemical properties of a fully cured laminate are affected more by the resin/glass ratio than any other single factor. EveryG RP workshop should therefore be equipped to carry out this simple test as a regular method of quality control. As a general guide a high glass content will give a high strength laminate, whilst a high resin content will give a laminate with better chemical, water, and weather resistance.
The resin/glass ratio is found by weighing a small piece of laminate — one both square centimetre is usually sufficient — in a crucible, ashing it over a Bunsen burner and reweighing it. Where a piece cannot be cut out of the laminate, a test coupon made at the same time as the moulding, can be used. This is of course not so satisfactory, but a relationship can be generally established between the results obtained with the test coupon and the actual moulding.
Degree of cure
Some of the variability of properties is due to differences in the state of cure reached by the resin at the time of the test. Severe under cure of the laminate is obvious since the laminate will be soft and gives a dull sound when tapped with a coin. Slight under cure is not so easy to detect. Although this will not affect much the mechanical properties of the laminate, it will almost certainly lead to rapid deterioration once the laminate is exposed to the weather.
A sub-committee of the Joint Services Advisory Board on Plastics has been examining the problem of assessment of cure of resins since 1953 and has initiated long series of test programmes to find a satisfactory solution. So far, no reliable simple non-destructive test has been found. Copies of two reports by Sub-committee 2 of the Joint Services Research and Development Committee on Plastics are available on request.
The first report covers work done from 1954 to 1959 and the second gives details of a solvent extraction procedure for assessing degree of cure of polyester resins.
From a practical point of view, i.e., under workshop conditions, the most convenient method giving an indication whether the laminate is suspect or not, is a surface hardness test. The edge of a coin may be sufficient to show if a laminate is as hard as it should be, but the best test instrument available so far is the Barcol Impresser.
Although Barcol hardness is not an absolute measurement of the state of cure, it does differentiate between a bad laminate and one not so bad a little more accurately than is possible by casual observation or by tapping the laminate with a coin. It would be safe to reject any laminate which gives a Barcol figure of less than 25. This does not mean, however, that every laminate giving a higher figure would necessarily be satisfactory. Fully cured unfilled cast polyester resins generally have a Barcol Hardness Number between 40 and 50, on model GYZJ 934—1. Although these figures can be taken as a rough standard, both fillers and reinforcement may cause considerable local variations in the readings.
Control of variables
Polyester/glass fibre laminates are not homogeneous structures and unlike most metals there is a considerable degree of variability in the physical properties of reinforced plastics. It can be kept to a minimum if the following factors are controlled:
-
Variations of resin content. Good rolling is essential; it should consolidate the reinforcement without disturbing its distribution or breaking the glass fibre strands into filaments.
-
Draughts. These cause excessive styrene loss leading to under cure.
-
Gel time. If this is too long the styrene loss through evaporation may be excessive.
-
Ambient temperature. This should be kept constant. If it does vary, the setting time should be controlled by adjusting the accelerator content, not the catalyst content.
-
Adequate mixing of curing agents.
-
Variation of strength in liquid catalyst, when used.
-
Time interval between addition of catalyst and addition of accelerator.