Repairing Damaged Laminate
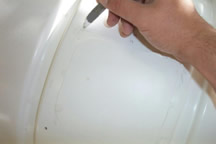
Mark out damaged area on fibreglass panel, staying at least 2” from initial damage.
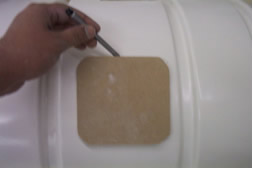
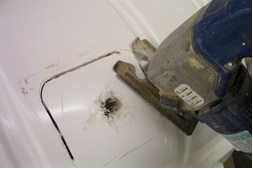
Cut out damage to an easy sized workable repair area, using either a jig saw with a diamond tipped blade or a pad saw, be sure to wear suitable health and safety equipment.
.jpg)
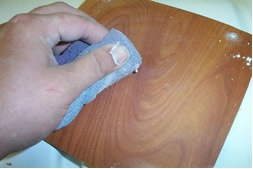
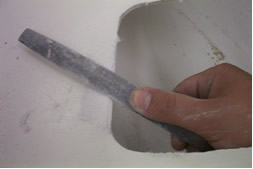
File away at 45 degrees angle starting inside, this allows easy surface to adhere to, this also ensures a good join. Abrade area inside panel and clean/degrease with Acetone.
Wipe all cut edges and area that will be worked on with acetone. Then wax a flexible or rigid board that will be bonded onto the back, this must have a melamine face on for releasing. Using self tapping screws from the outside, fix laminate board onto repair area.
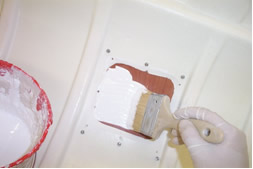
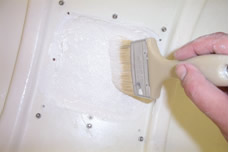
Brush Gelcoat onto board, then allow to cure, a second coat may be necessary depending on how neat the tapped plate is in place, as it is quite easy to rub the gel coat away and reach the chopped strand matting if care is not taken.
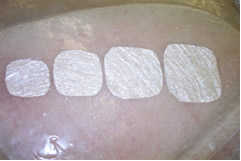
It’s best to copy the laminate construction, cut your pieces of matting prior to mixing your resin, cut say 3 the same size as the void, then the following pieces ½ inch bigger each piece, this is all relevant to the actual size of your repair, the one illustrated is approximately 3” square.
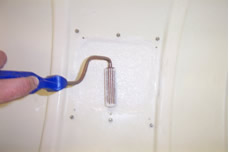
If you putting any more than four layers on do it in two stages due to the exothermic build up that will be generated. If you are leaving more than 24 hours laminate must be abraded and wiped with Acetone. Stipple fibreglass matting into place then using a paddle roller, roll and consolidate matting and resin.
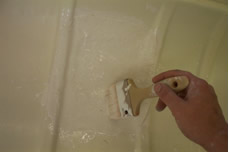
Overlap repaired area as much as you can physically manage, at least 2 – 3 inches is advisable, again this is relevant to this 3” square repair.
Take out self tapping screws and fill holes with a Gelcoat mix, carefully using a pointed tool fill and work in, leave slightly proud to allow for shrinkage.
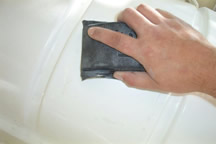
Working through the grades of wet and dry paper, i.e 240 grit , 600 grit , 800 grit and if need be 1200 grit , rub back being careful to follow the profile of the original part, changing direction of the rubbing block, so as not to rub grooves into panel. Final operation is buffing with a polishing compound to the desired finish.
Please note before undertaken any major repair work you should seek your own professional advisor.
This advice and information is given in good faith for guidance only, and is given without warranty, users should determine information given and using their own judgement determine suitability. We cannot accept any liability for any losses.
Please read Health and Safety notes on site and general laminating tips. Be extra careful when using Acetone due to the Hazardous nature of the material, read all hazardous labels that are present on tins.
Repairing Damaged Laminate (If you can not get access from inside)
Unfortunately, there are often instances where a section of a laminate cannot be reached from the interior – in such cases, it is necessary to make a “prefabricated” glass fibre patch which can be pushed through the hole from outside.
1) First prepare the damaged area, cut out area, file a 45 degree angle leading into repair, i.e abrade and wipe with Acetone.
2) Clean some perforated zinc / aluminium mesh with a little brush cleaner to remove any grease, then cut it to the shape of the hole but slightly oversize. Use the section as a template to cut several pieces of glassfibre mat – two or three will be enough for many repairs.
3) Paint a piece of zinc or aluminium mash with resin and cover with the first piece of mat. Impregnate the glassfibre by stippling with a brush, adding more resin if needed. The glassfibre becomes translucent when properly impregnated.
4) Consolidate the layer with a metal roller. Add further layers, (consolidating each in turn), to build up the required thickness. You will have to work quickly, as the resin will already be curing.
5) Bend a piece of wire into a U shape and push the ends through the patch from the metal side. Push the entire patch through the hole, you will have to manoeuvre into position by bending slightly (as it was cut bigger than the hole going into) , then pull back on the wires. The patch should flatten out in contact with the inside surface.
6) Twist the wires round a batten to hold the patch in place use spacers to prevent the patch and batten coming into contact. Leave to harden about 2 hours at 20 deg C
7) When the patch is hard, remove the batten and cut the protruding wires flush with the surface.
8) A slight depression may be left – fill this with a dough lay up resin mixed with glassfibre strands. When hardened sand down.
9) Paint with gel coat. Since gelcoat is affected by air inhibition, it will retain a tacky surface. This can be avoided by adding 2ml of solution MW to each 100g of gelcoat. Alternatively, tape Polyester Film over the gelcoat. Leave it to harden.
10) When the surface is hard, rub down the gelcoat with Rubbing Compound. Allow to cure thoroughly, if needed prime and paint to match the surrounding surface.
Please note before undertaken any major repair work you should seek your own professional advisor.
This advice and information is given in good faith for guidance only, and is given without warranty, users should determine information given and using their own judgement determine suitability. We cannot accept any liability for any losses. Please read Health and Safety notes on site and general laminating tips. Be extra careful when using Acetone due to the Hazardous nature of the material, observe all hazardous labels that are present on tins