Fibreglass Bust from Silicone mould of Plaster lifecast

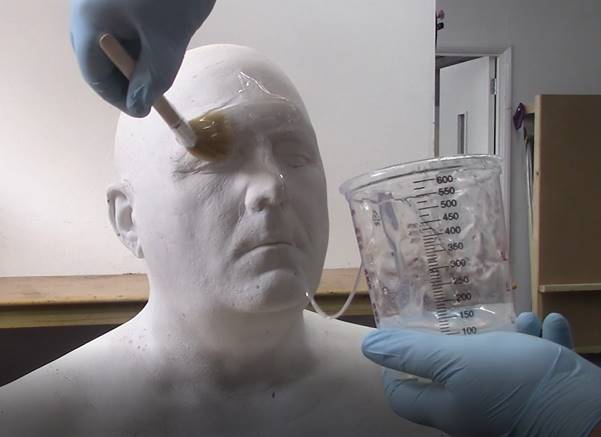
First you will need to apply a skin coat or sometimes referred to as a ‘detail coat’ of silicone to your plaster life cast. To do this mix up a required amount of silicone with its curing agent at the correct specified mix ratio. For this guide we used our addition cure silicone with 10% curing agent added.
Mix the two parts together thoroughly. As the silicone and curing agent are both clear it is important to scrape around the sides of the cup and into the corners and keep mixing well, even when you think its had a good mix, mix again to be 100% sure that the curing agent is mixed equally into the base silicone.
Then transfer the mixture into a de-gassing chamber to draw out all of the air from the silicone mixture. If you do not do this then your mould will be full of tiny air pockets which will create lumps on your final cast.
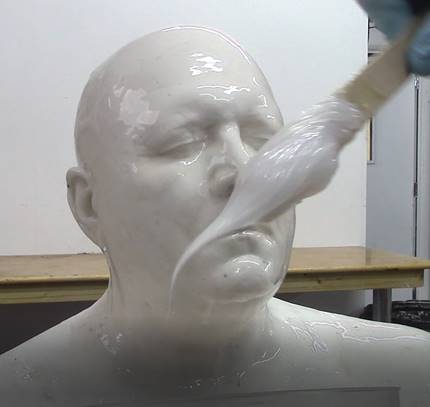
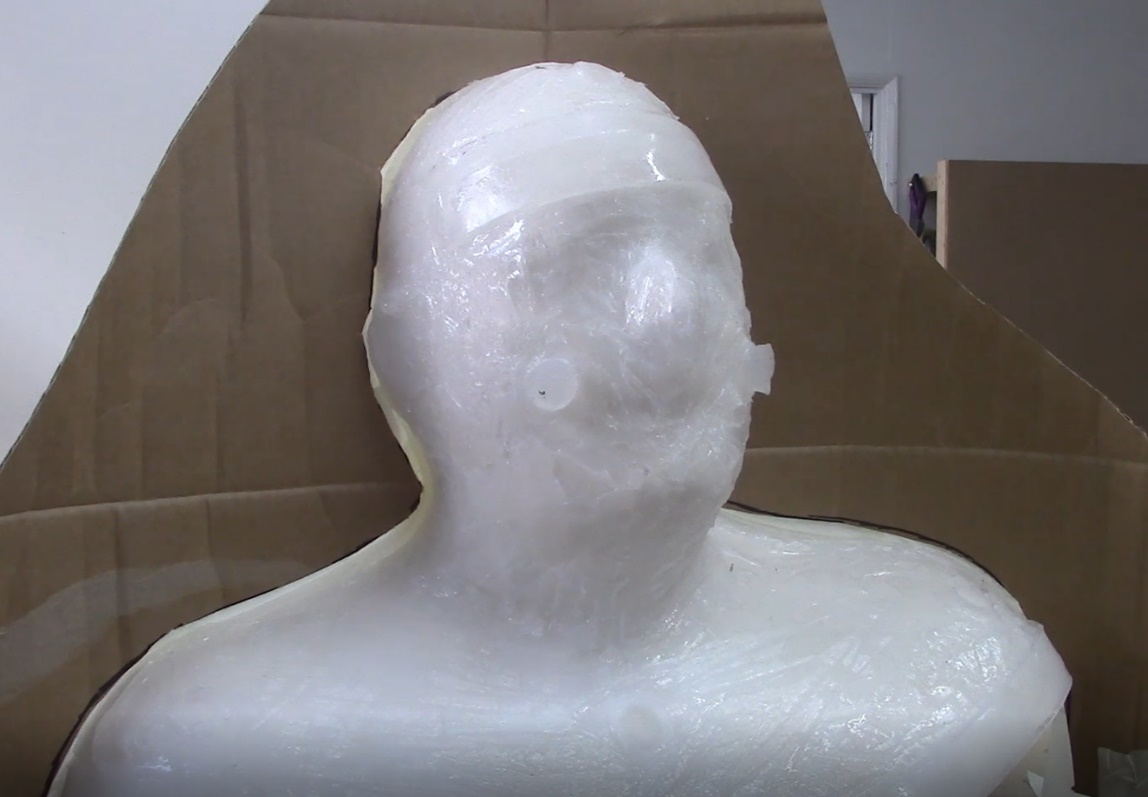
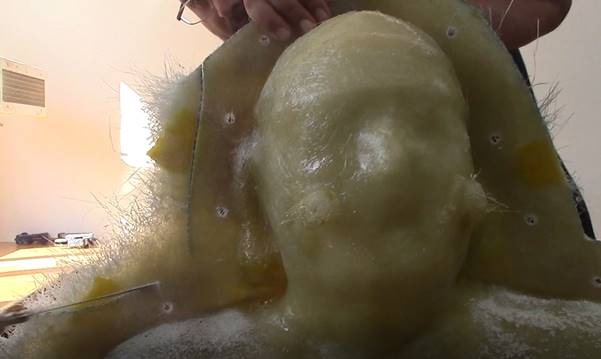
Apply the degassed mixture to your plaster cast, this will ensure all the fine detail has been picked up and will be transferred onto your mould, ensuring the whole head cast is covered.
Repeat this step 2-3 times to ensure you have a good thickness of silicone.
Then to speed things up mix a batch of silicone again but add a tiny amount of silicone thickening agent to create a mixture that resembles a Vaseline like consistency. There is no need to degas this mixture.
Apply on top of your detail coat ensuring that you don’t create any air pockets.
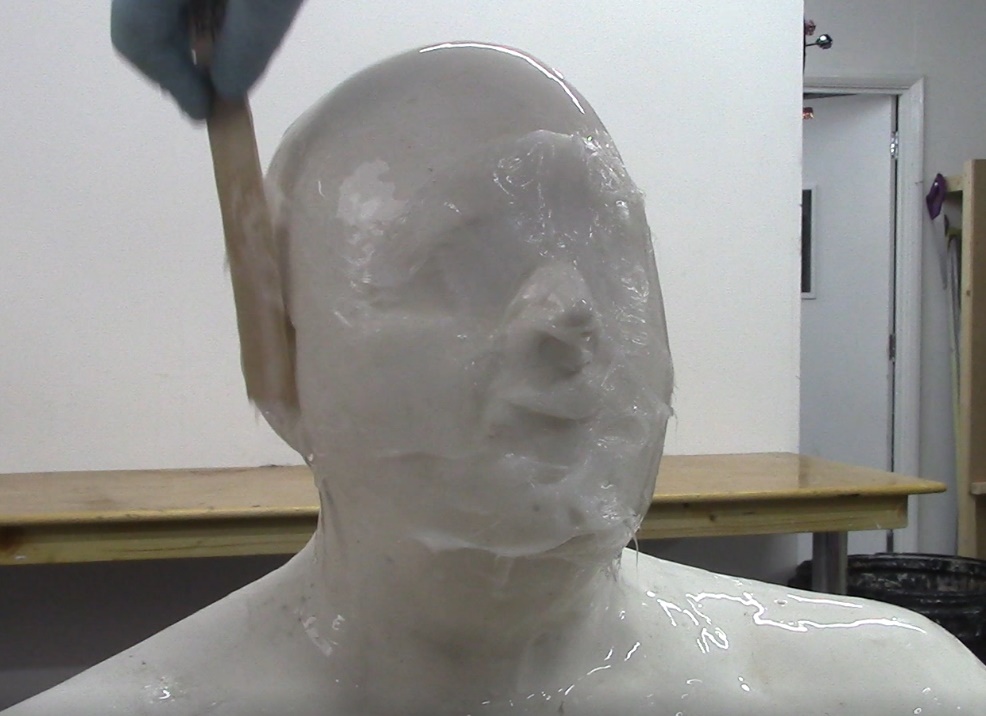
apply the thickened mixture by kind of rolling it into the deep areas so that the mixture goes in without allowing air to be trapped. You want to avoid bridging the mixture over these areas.
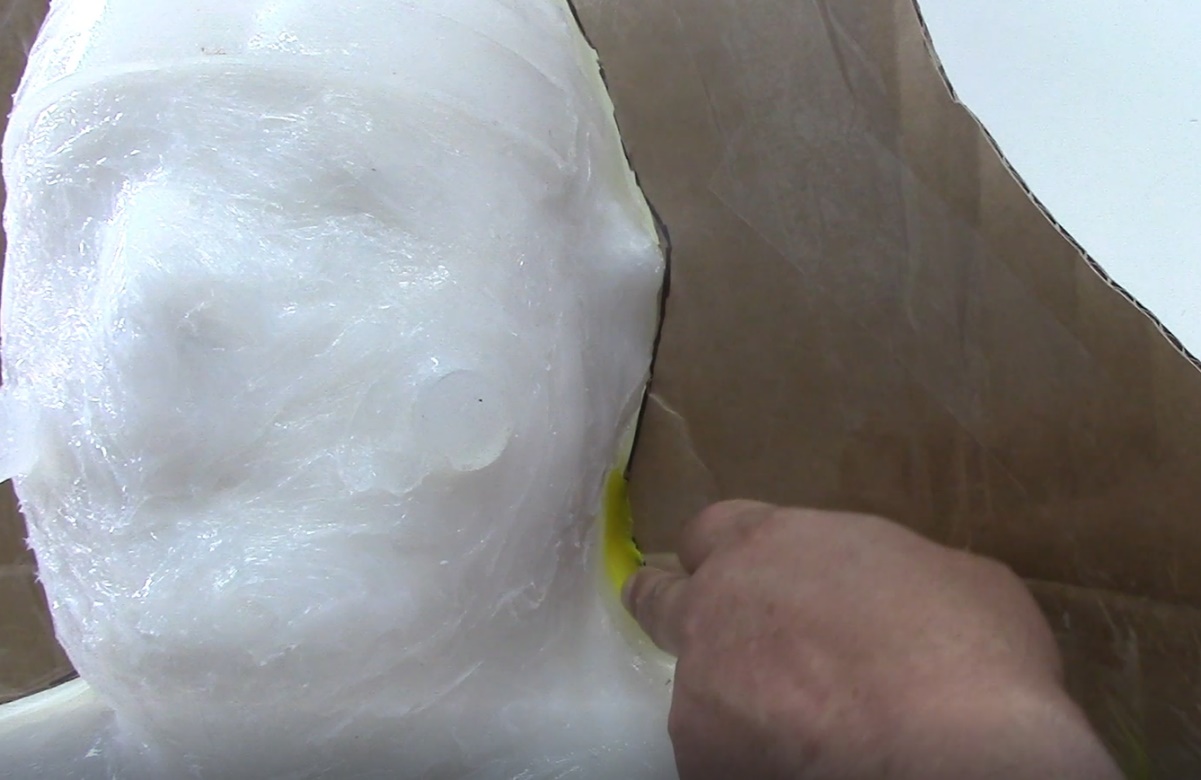
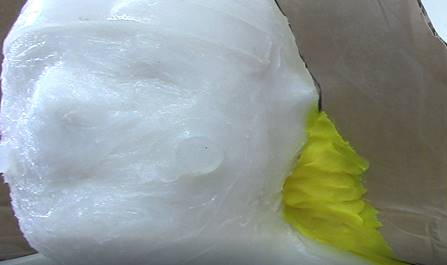
Once the whole head is covered you can add what are known as registration keys. These keys will ensure that the silicone part of the mould locks into the fibreglass jacket without moving.
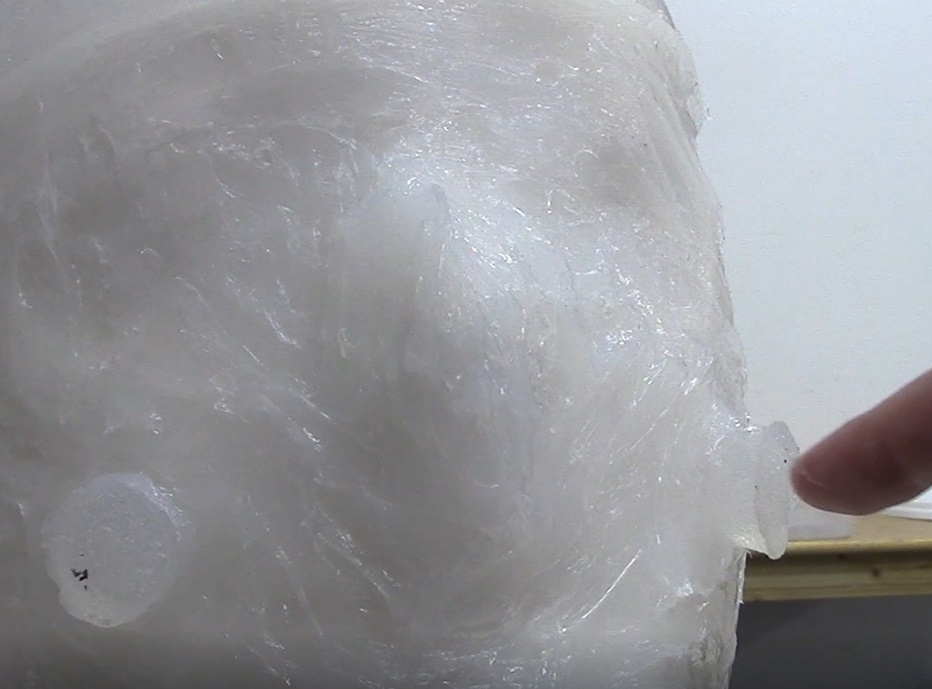
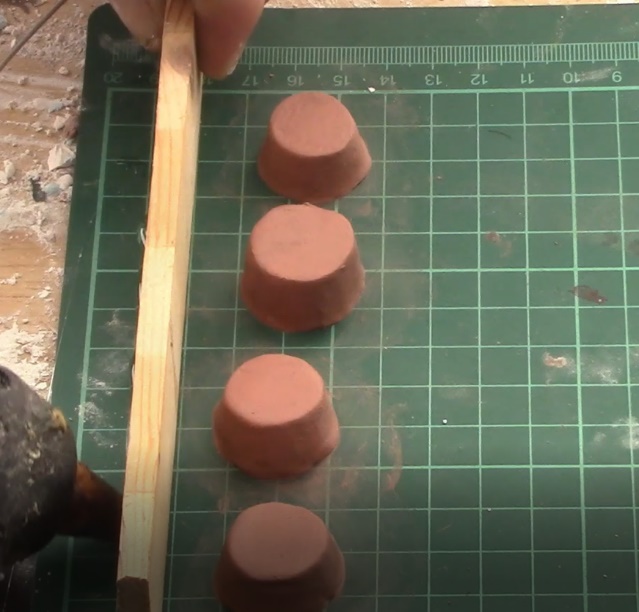
To make the registration keys we fist made a mould by making tapered round shapes from modelling clay in this case we used chavant NSP. Then mounted them onto an old plastic cutting board.
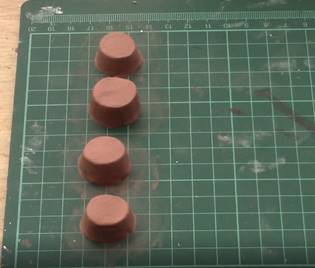
Then we build a wall around the shapes, any flat material or clay can be used to construct the wall, even lego is sometimes used for the stage but we used timber and glued it in place with a hot glue gun.
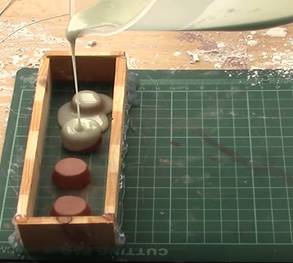
Then we poured in a resin and talc mixture and left it to cure.
Once cure we removed our resin mould, dug out the clay then poured silicone into the mould to create our registration keys.

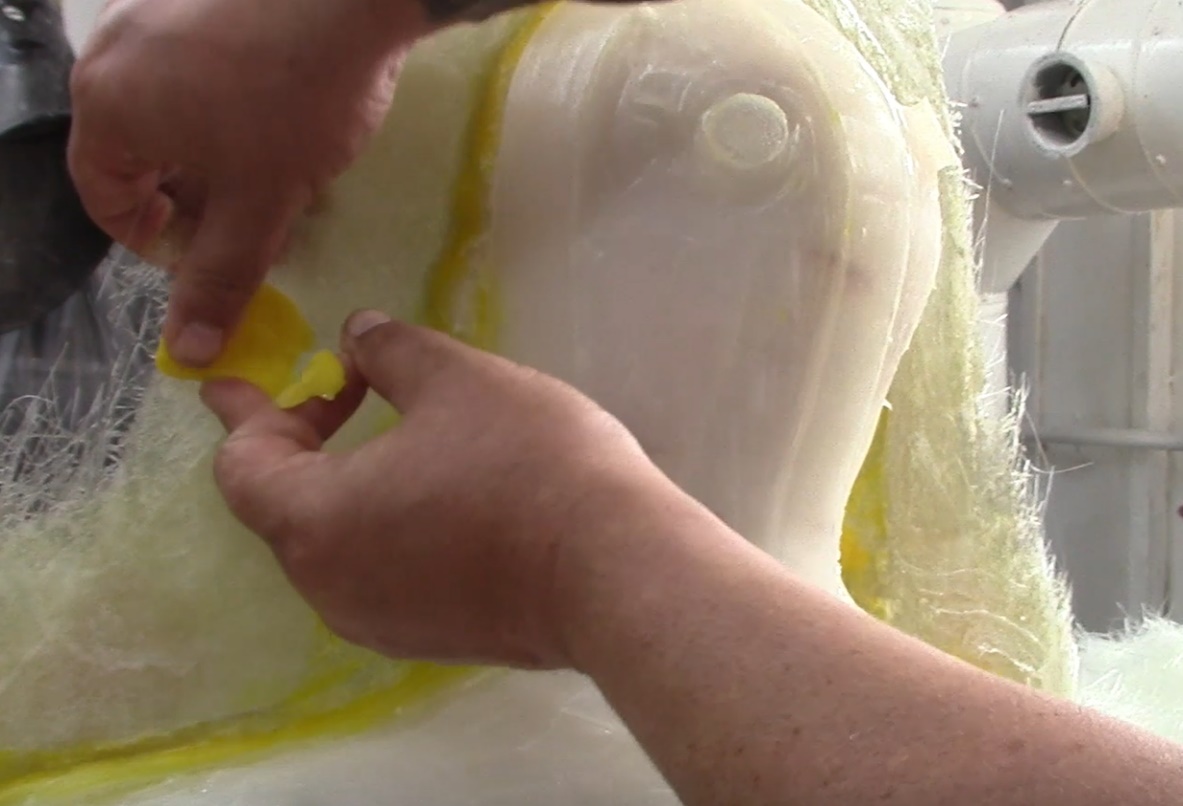
Use another batch of thickened silicone to glue these registration keys into place. You can also cast flat strips of silicone to bond onto you mould in key areas to strengthen edges and split lines etc..
We need to create a wall around where our split line will be on our mould. This will form our fibreglass split flange / bolt flange. Here we have constructed this using carboard although other materials can be used for this such as chavant clay if you have the budget for it? cardboard is quite suitable and cheap for this purpose.
We coated the cardboard in parcel tape to make the cardboard nonporous. then filled any gaps with a wax-based clay. we are using a bees wax based mould clay such as Nakiplast . Nakiplast is nice and soft and allows us to push it in place without too much force needed against the cardboard.
Any areas where the cardboard cannot reach or where the split line is too contoured for the card to follow, such as the split line around the ear, we simply build this up with Nakiplast.
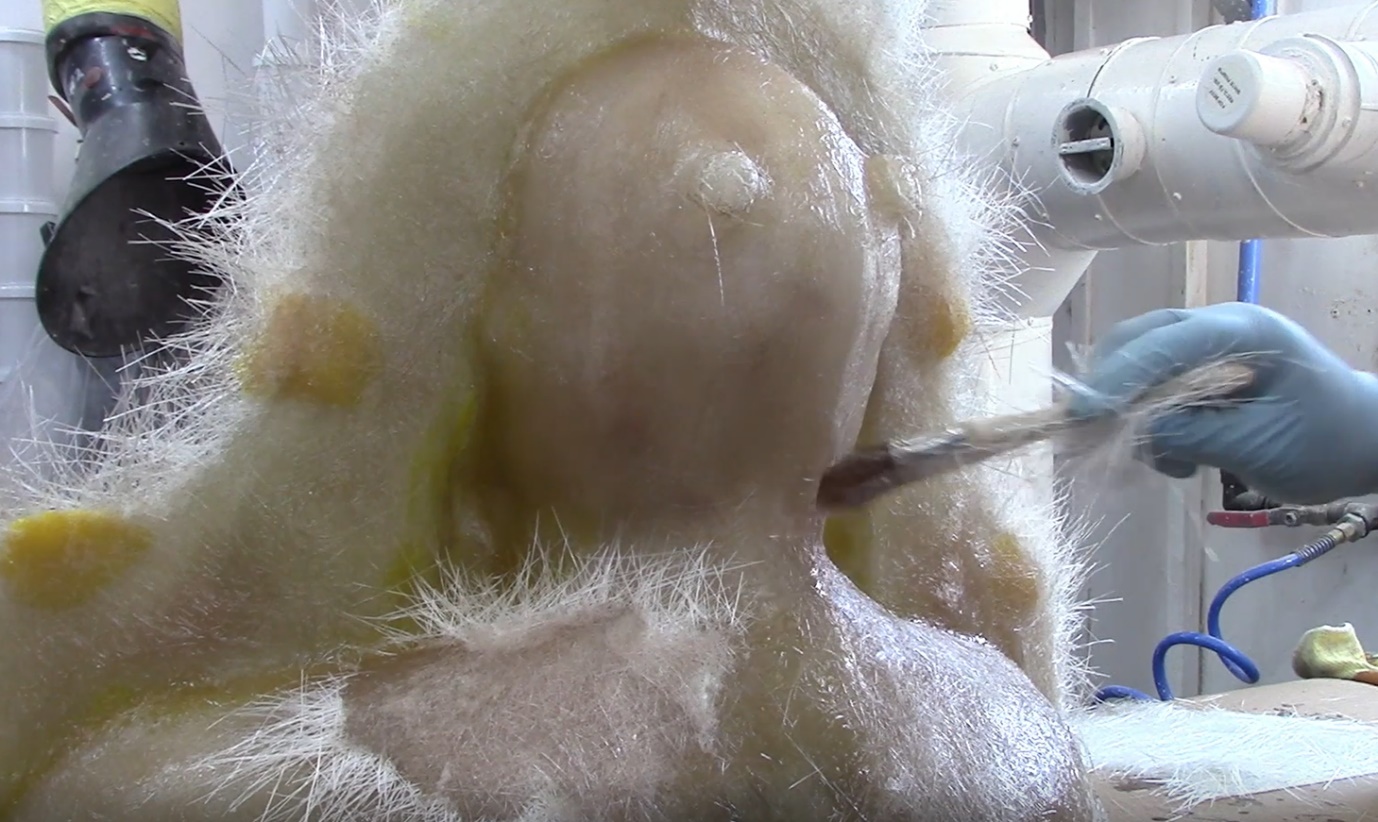
Now we apply the resin and fibreglass to make our supporting jacket for the silicone mould. 3mm chopped strands may be need in awkward areas such as around the registration keys before the main fibreglass sheets are applied.

Once cured, remove the cardboard former and the Nakiplast, apply a release agent to the fibreglass flange that has been created or in this case we used just a quick smear of Vaseline. This will stop the two halves bonding when you fibreglass the second half.
One tip is to apply a few little wedges of Nakiplast or modelling clay on the outer edges of the split flange, this will allow you to easily insert wedges later to pry the two halves apart.
Next repeat the fibreglassing stage as previous.
And leave to cure overnight to reduce risk of shrinkage which can be caused by removing the halves too early.
When cured drill bolt holes, cut the rough edges from the split flanges and sand off any rough areas and fibreglass splinters.
using wedges remove the fibreglass jacket and clean off any loose bits of cured of resin etc from the silicone.
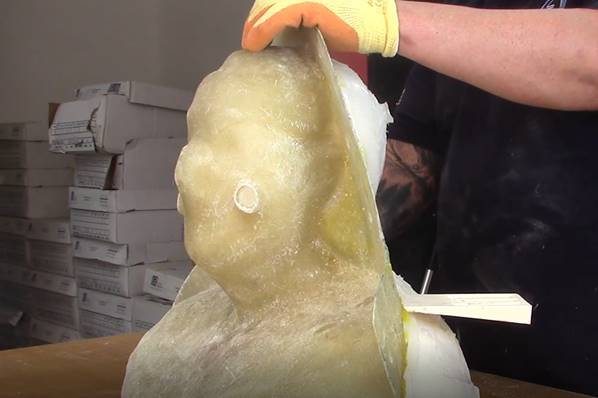
now cut your split line into the silicone mould. Try to follow closely to the same split line in your fibreglass jacket. You can mark this line off with a pen to help.

Then start removing the silicone mould and remove any bits of plaster that are stuck in the mould as delicate parts such as the ears will most likely break off during the de-moulding process. pop the halves into there supporting jackets then we can start the moulding process.
We cast the ears in resin first (as shown below) these are too awkward to be able to lay fibreglass into them, we are using resin coloured the same colour as the gelcoat.

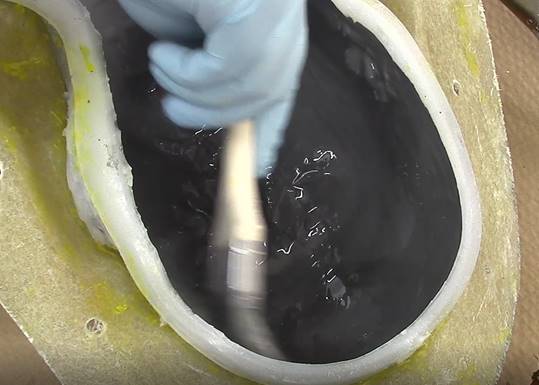
Now that the ears have cured we can start to apply the gelcoat layer. Cover the whole area. try to bring the gelcoat close to the edge but don’t get any on the seam line where the two halves join as this will stop the mould from lining up correctly when we re-assemble the mould.
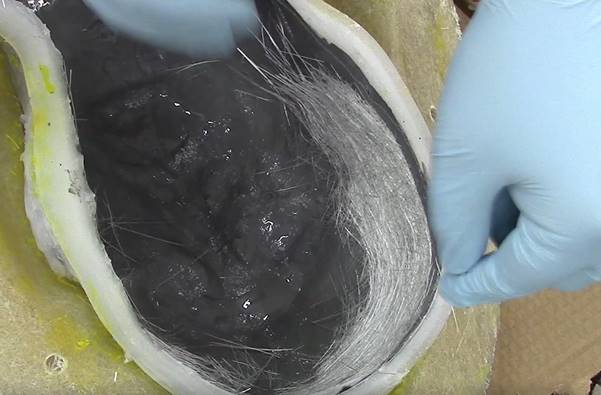
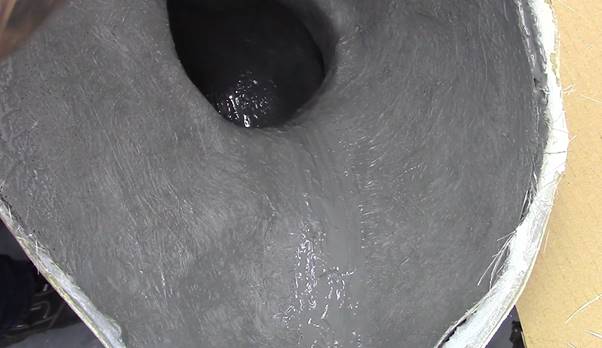
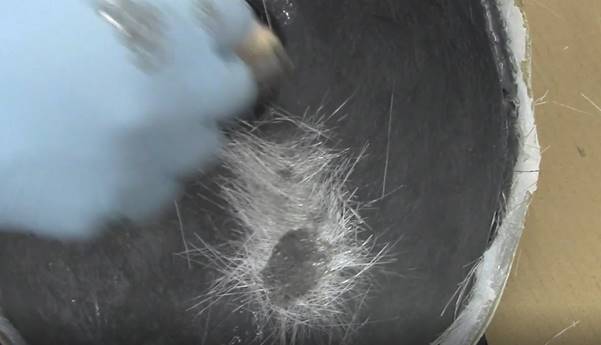
Once the gelcoat has cured, we can start applying the fibreglass. Here we are using 3mm chopped strands.

The 3mm strands will get into awkward corners and areas that the chopped strand matting may struggle to get into such as around the eyes nose and mouth. Keep adding and building up the 3mm strand layers and moving them around until you are happy these areas are taken care of.
Now apply the matting, work around the edges first using pieces of matting cut with a straight edge, remove any stray strands that may prevent the mould from closing along the seam line.
Apply the matting approx. 1-2cm short of the edge so it doesn’t interfere with the seam line. Once the edges are neatly taken care of cover the rest of the gelcoated areas with fibreglass. We then repeated this lay-up on the other half although we didn’t need 3mm strands as there are no awkward areas. Once cured inspect the seam line and ensure it is free from any strands or hard drips or residue of resin etc.
Re-assemble the mould bolting the two halves together and ensuring the silicone mould is perfectly lined up then apply a gelcoat along the seam line and leave this to cure.
Apply more matting and resin along the seamline to join the two halves together as below.
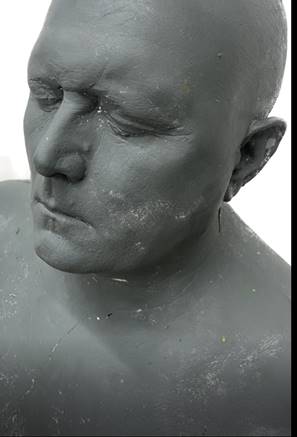
Once cure you can start to remove the fibreglass jacket and peel away the silicone mould. you may notice as shown in the below (left) that your first cast may have chalky and white residue from remnants of plaster left behind on your mould’s surface. However, your second cast as shown below (right) should be perfectly clean.
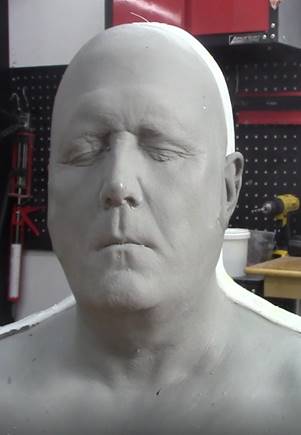
This head bust can now be used as a re-usable Sculpting Armature for mask making this will ensure all masks created using this armature will fit the casting volunteer perfectly each time.
For the silicone mould we used addition cure silicone https://www.ecfibreglasssupplies.co.uk/addition-cure-silicone-rubber
Along with a silicone thickening agent for the final coats https://www.ecfibreglasssupplies.co.uk/thixo-rtv-thickening-agent
For the casting we used polyester gelcoat :-
https://www.ecfibreglasssupplies.co.uk/coloured-polyester-brush-gelcoat-ral-colours
The resin we used for this was general purpose polyester resin
https://www.ecfibreglasssupplies.co.uk/general-purpose-2-8500-polyester-resin-including-catalyst
We pigmented the resin with a polyester pigment
https://www.ecfibreglasssupplies.co.uk/polyester-pigments-ral-colours
we also used 3mm chopped strands https://www.ecfibreglasssupplies.co.uk/chopped-strands-3-mm
and 450g chopped strand matting https://www.ecfibreglasssupplies.co.uk/450g-15-oz-chopped-strand-matting-1mt-wide
other products featured :-
Nakiplast https://www.ecfibreglasssupplies.co.uk/pelikan-nakiplast-wax-block-650g
Chavant clay (we sued the soft version) https://www.ecfibreglasssupplies.co.uk/search/for/chavant/
This advice and information is given in good faith for guidance only. and is given without warranty, users should determine information given and using their own judgment to determine suitability.
To reassure our customers - all materials supplied by East Coast Fibreglass Supplies are of the finest quality, manufactured by companies such as Scott Bader, DSM, Owens Corning to name but a few, who all have supplied materials into the Composites industry for many years on a global scale. Samples from every batch manufactured are retained for testing, should the need arise.